Audacity
Audacity: BasicEditing
Basic Editing with Audacity
Software name: Audacity
Software version: 2.2.1
As far as audio editing software goes, Audacity is about as easy as it gets. Which is not to say it's falling off a log: if you haven't edited audio before then the whole concept can get a little bewildering. However, with a little practice, you should be able to make fast work of editing.
Firstly, you will have to have some audio to edit. You can either record some audio using Audacity or open an audio file from your computer.
There are some simple methods that form the basis of editing with Audacity. We will look at deleting sections of audio ('cutting'), as well as shifting audio. With these two methods, you can already do quite a lot.
Cutting/Deleting
You will need to have Audacity open in front of you with an audio file ready to edit. The process of editing requires that you first know your source file quite well, or, more specifically, the audio track wave-form of that file loaded into Audacity. You need to know exactly where a cut needs to be made, to achieve some intended effect, so play the audio track repeatedly and listen for where you want to make your first edit.
Let's assume you have chosen the area to be cut: you need to now select that area. First, click on the 'select' icon on the Control bar (as shown below); the place your mouse cursor at the point where the cut should start, hold down the mouse button, and drag the mouse (either left or right) to the end of the area to be cut. The area to be deleted will be highlighted in a lighter shade of grey than the rest of the track (notice also that when you select an audio region in Audacity, your mouse cursor changes into a pointing hand):
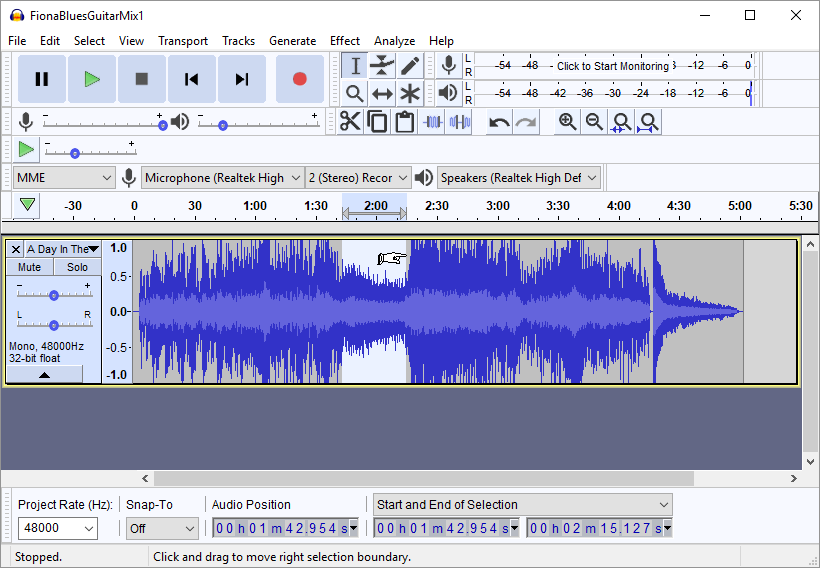
In the above example, you can see that I have highlighted the area from about 1:32 to 2:17, a selection of about 45 seconds. To delete this selected region, I can now click on the Edit menu and choose 'Cut':
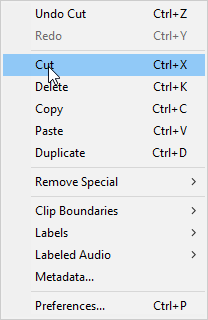
We should observe here that 'Cut' and 'Delete' are distinct functions, with the important difference that with Cut, the selected audio region is removed from the track but loaded onto the clipboard (from which it can later be Pasted, if desired), while with Delete that segment simply disappears. But with either function, once you choose it in the Edit menu you will see that the selected region of your audio track has disappeared, and the length of that track will have been reduced by a corresponding duration (with the remaining segment to the right of the cut shifted left):
Focusing on the area to be cut
If you have just opened an audio file, press the green play button to listen to the entire track:
![]()
Once you have listened to it you may wish to take some notes to help you decide which area you wish to delete/cut. You can take notes that reference the exact time in the timeline, or--probably easier--you can add a label track and insert a label marking the exact point or segment you think might be a candidate for editing. It is also a good idea to replay the segment that you will cut to make sure you are selecting the right area. To do this you can select the area, as described above, and then press the play button and Audacity will only play back the selected area. This will help you decide if the selected area is actually the audio you wish to delete. If it's not, clicking anywhere outside that track will deselect that area, and you can try again.
If you need to focus closer to the audio to make a 'finer' cut, click on the magnifying glass + icon:
![]()
This will enlarge the time scale shown and give you a more detailed view of the audio wave-form. Remember that this wave-form is an exact visual representation of the audio signal itself: to edit one, at whatever level of detail, is to edit the other. You can 'zoom out' of the audio again by pressing the magnifying glass with the minus sign in it:
![]()
Pasting
If you wish to shift audio from one place to another then you can easily do so with Audacity. First, select the area you wish to shift. I will use the same segment I used in the cutting example above. Now, as before, choose Edit > Cut to remove the selected region from the track and place it on the clipboard.
Finally, click on the remaining audio track at the point you where you want this audio to be shifted to.

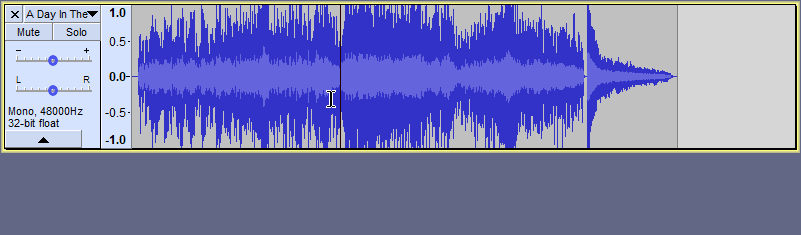
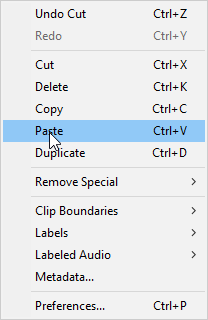
In the above example, you can see that I have decided to insert the audio at about the 2:47 mark. Now choose the Edit menu and select Paste:
The audio segment will now be inserted, and you if you look at the Audacity window you should see the selected audio in its new place:

Now you can experiment with cutting and pasting audio! In the next chapter, we will see more complex examples of cutting and copying/pasting applied not only to single tracks but to multiple tracks across a project as part of what we call "mixing" audio tracks.