Audacity
Audacity: AdvancedEditing
Advanced Editing and Mixing
Software name : Audacity
Software version : 2.2.1
There are many more advanced steps for editing that you can carry out with Audacity. Some of the more common include adding silence, trimming audio, advanced cutting and pasting, splitting and joining tracks, and using panning. We will cover each of these operations below.
Add Silence
You may want to add a silence to a track for several reasons. If we take the example of a two track project with one track as music and the other track as a voice track, we can imagine that we might want to insert a silence in the voice track for several seconds to allow us to 'fade in' the music. This would work in a radio advertisement or introduction for a radio show or podcast.
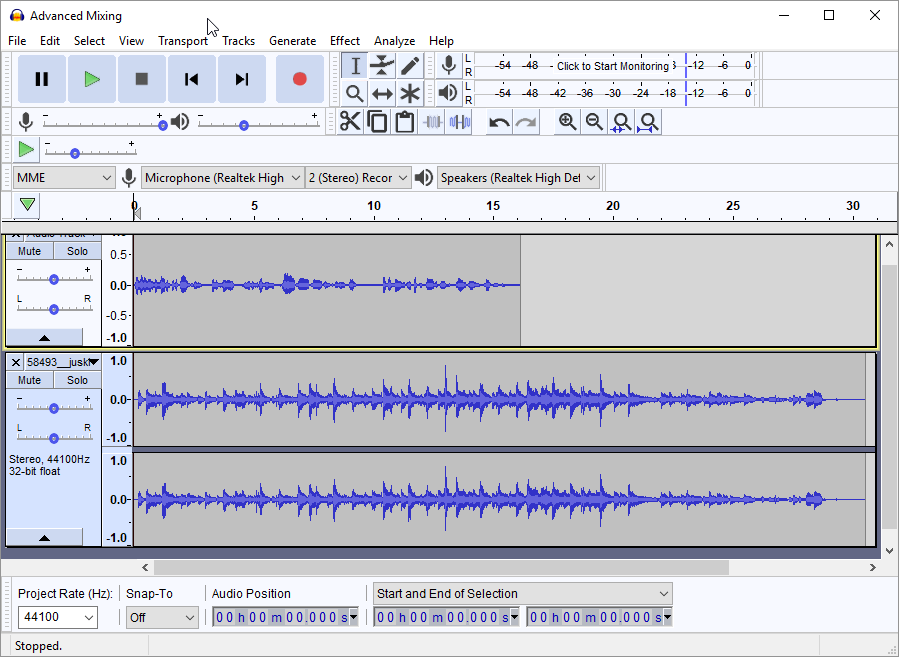
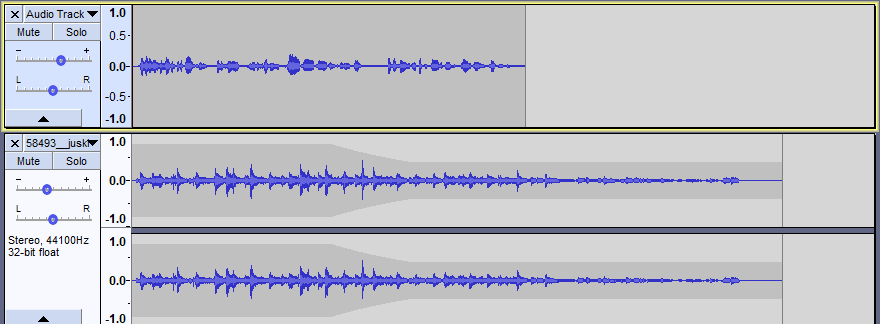
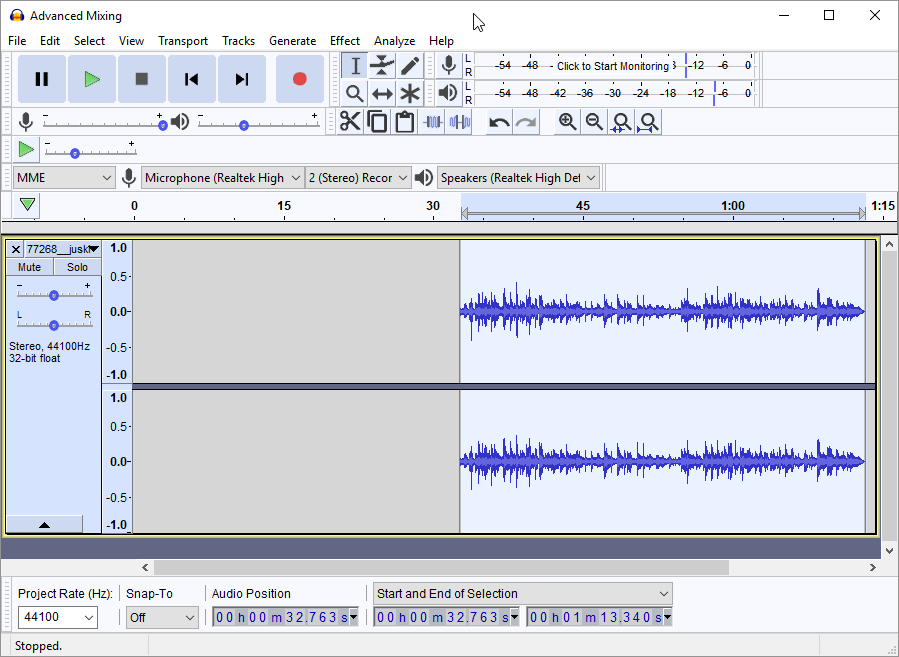
Here I have loaded an audio track (in mono), and a stereo music track beneath it:
We now click in the voice track where we want to insert silence.
When the voice track is selected you will see the control set of that track go a darker color, and at the point of selection itself your cursor becomes a pointing hand. Here I have selected the very start of the vocal track, as I want to insert silence in that track to allow the music to come in before the voice begins speaking:

We are now ready to insert some silence. Do this by selecting Generate > Silence from the menus at the top of the screen.

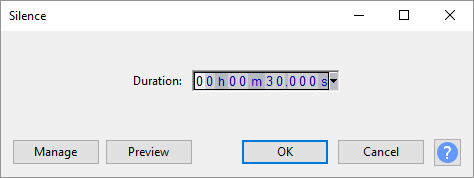
Selecting 'Silence...' from the above menu will generate the 'Silence' dialog shown below, where we can set the duration of the silence to be inserted. The default silence duration is 30 seconds, as shown. 30 seconds would be quite a long silence in our example, but when you are adding Silence it is easier to add more and then delete some of it than to add in additional silence. So I'm going to keep the default 30 seconds to start with:
Press 'OK'. We will see the silence appear as a flat line in the relevant track of the project.
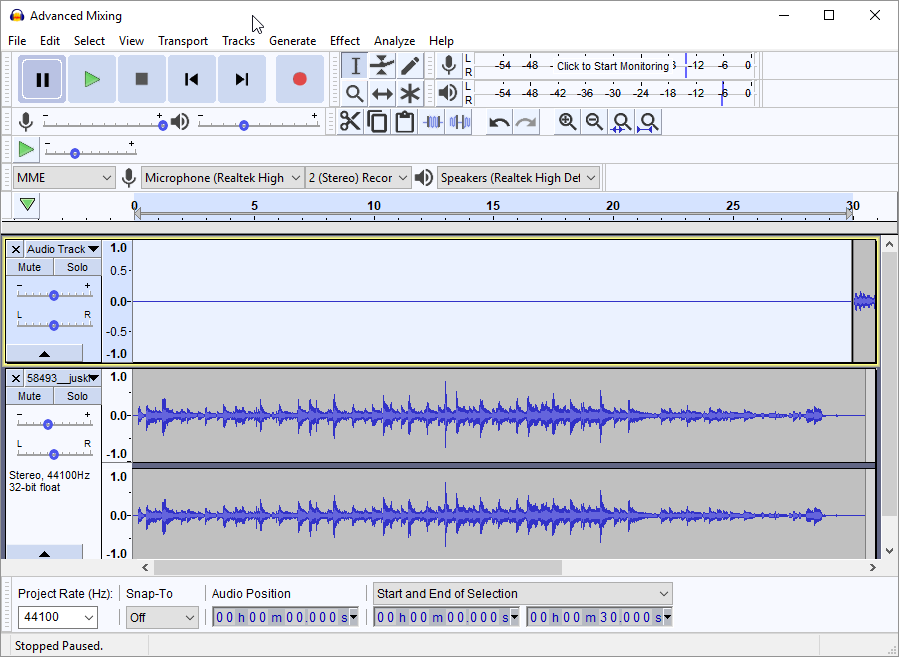
As noted above, 30 seconds is a very long silence for our purposes; after some experimental listening I will end up cutting it down to 11 seconds. Meanwhile, note that the actual audio wave form of the vocal track has been pushed all the way to the far right of the window; in othe words the total voice track is now 30 seconds longer, including the silence at the beginning.
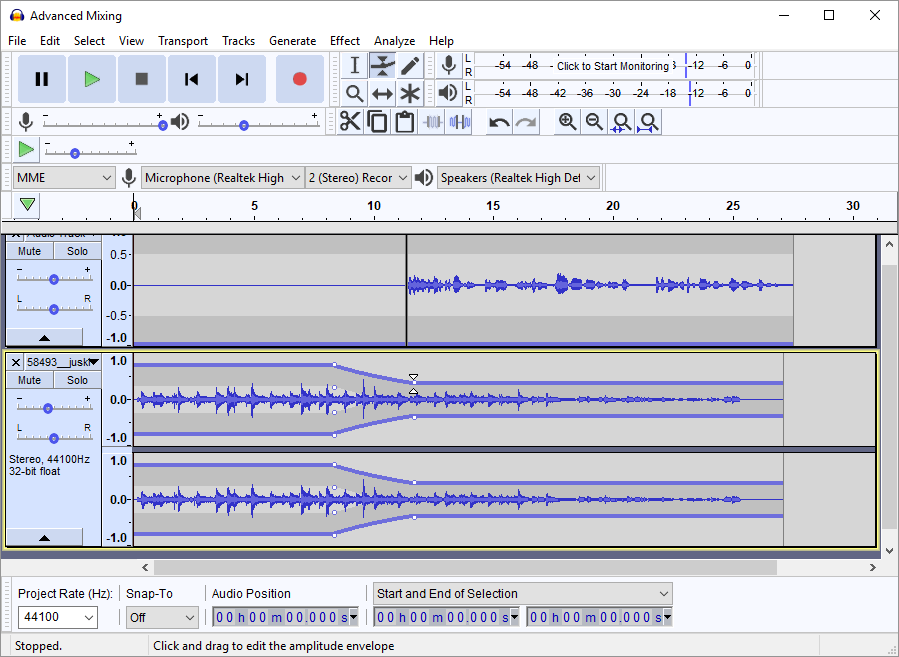
After I have trimmed the silence down to 11 seconds (I select the first 18 seconds and use the 'cut' tool, not shown here, to eliminate that segment), I now have an audio mix with 11 seconds of music before the voice comes in. However, the music is still too loud to serve properly as 'background' to the rest of the voice track. To fix this I will use the envelope tool (see previous chapter) to create a smooth fade out in the music track, just before the voice comes in:
If I determined at this point that the voice track was still too quiet in relation to the music track, I could either increase the overall gain (volume) of the voice track, or decrease that of the music track. A great deal of audio mixing involves playing with the relative volume of different tracks.
Time Shift Tool
The time shift tool allows you to alter the time location of the audio on a particular track. This is useful when you are arranging audio on different tracks so that they are heard one after the other in a sequence. Indeed, this would have been an alternative approach to take in addressing our voice-and-music-background scenario above. In the screenshot below, I have deleted the rest of the silence from the vocal track, so that now both the vocal and music tracks begin once more at 0.00 seconds (I've left the 'fade' in the music track, as I will still want it):
Our goal now is to shift the voice track to the right, so that it doesn't begin until the appropriate moment in the fade-out of the music track beneath it. To do this, we select the Time Shift tool ![]() from the Tools toolbar at the top of the workspace:
from the Tools toolbar at the top of the workspace:

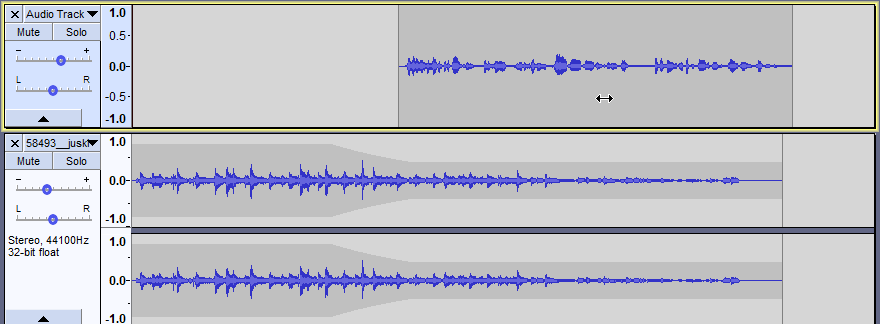
Then we select the track we want to move, and drag it left or right to occupy a new time location. In this case I'm dragging the voice track to the right, until it begins at the 11-second mark. When I now play the project back, the effect will be exactly the same as when the first 11 seconds were occupied by silence, since Audacity treats the opening blank space exactly as it would a duration of explicitly-defined silence:
In other cases, however, you might want one track's waveform to begin only after another track ends entirely, rather than overlapping, as above. For the screenshot below, I have truncated the music track after the fade, so that it will no longer sound in the background of the voice track:
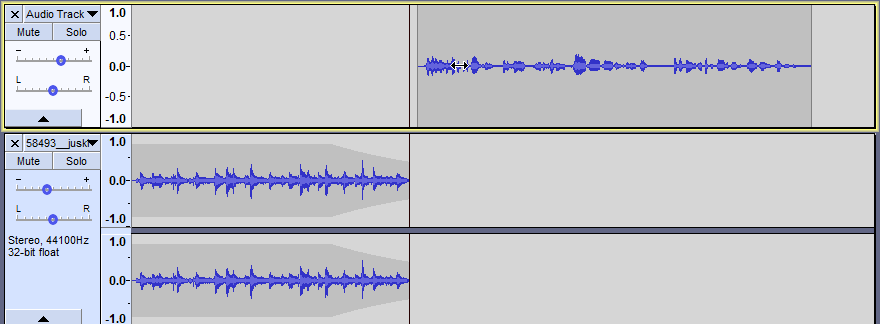
I have actually dragged the voice track just beyond the new end-point of the music track, in order to show that Audacity has guessed what I'm trying to do, and drawn a guideline (often called a 'snap line') for me at the precise point where the lower track ends. In practice, you may or may not want to align your tracks precisely this way, along the guide lines: in this instance, I would probably want to give the music track at least another second or two to fade out completely, as the voice track was coming in. But perfect end-to-end alignment is easy, as you can see. Indeed, rather than time-shifting manually, you could also use Tracks > Align Tracks > Align End to End to exactly align two selected tracks.
Trimming Audio
Trimming audio tracks is useful when we only want to keep one part of a given track. It is also different from using the cut or delete function as it maintains the time location of the part of the track we want to keep.
As an example, we are going to trim a music track to only include the segment after the first 32 seconds. First we click the Selection tool from the Tools toolbar:
![]()
then, using the mouse cursor, we select the region of the track after the 32-second mark. Note that for purposes of trimming, we select the segment of the track we want to keep, not the part we want to discard:
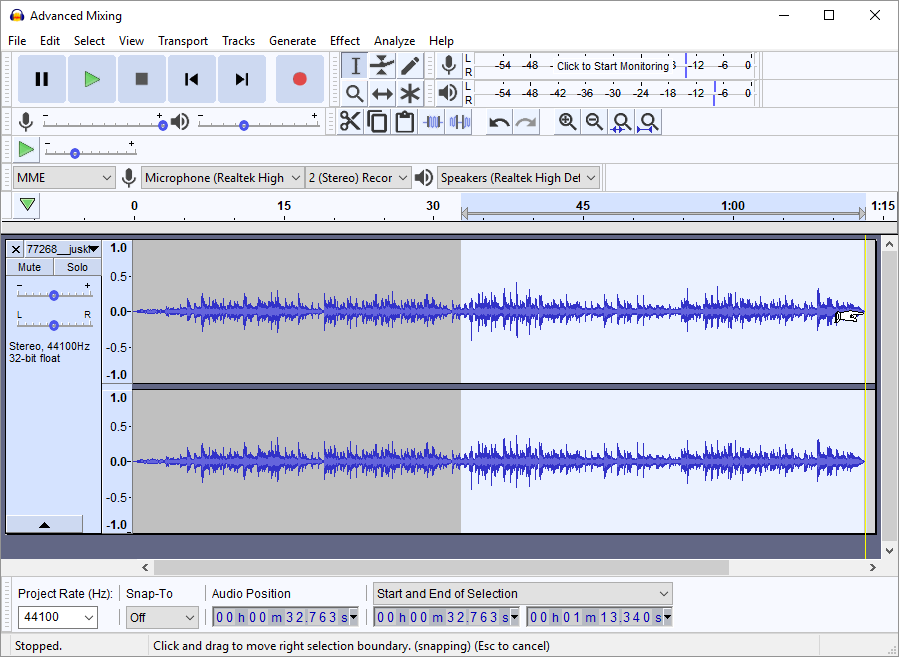
As always, when we have selected a particular region of audio it should show up in a lighter color, as above. Now we click on the Trim button of the Tools toolbar:
![]()
Once we have clicked the Trim button, only the region we selected should remain in the track:
Notice that the first 32 seconds is now gone, but the remaining audio waveform has not shifted to the left (to 0 seconds), as it would have had we instead selected the first 32 seconds and used Edit > Cut or Edit > Delete. Trimming is therefore a good way to preserve the relative position of a segment of audio track in relation to other tracks in the project, and to the overall timeline.
Advanced Pasting
As we saw in the previous chapter, not only can you Cut or Copy a segment of audio track in Audacity, you can also Paste that segment at a different location, and as many times as you wish. We do this by selecting the audio segment of interest, then using Edit > Cut or Edit > Copy, depending on whether we want that segment to remain in its original place. We can also use the Cut or Copy buttons on the Tools toolbar:
![]()
![]()
Both Cut and Copy will load the selected audio segment onto the clipboard, where it will remain until we either end the current Audacity session or Cut/Copy a different segment. We can then place our mouse cursor wherever we want the segment to go, and use Edit > Paste or the Past button on the toolbar:
![]()
Pasting is useful for any number of reasons. You might like a particular music segment for background to your voice or other music tracks, but find that it is too short; in this case you can simply copy and paste that segment end to end in the same track until it is the required length with respect to other tracks.
Of course, pasted segments needn't be end to end, or even be pasted into the same track they were copied from. One of the most interesting uses of pasting in Audacity is for 'sampling', when you've found a particular (typically short) segment of sound that you want repeated at regular intervals or other appropriate moments in the overall audio project. Give a listen to the Beatles' "Tomorrow Never Knows" or "Revolution No. 9" for early examples of extremely complex sampling or sound collage of this kind. In that era, the sound engineers had to literally copy and paste dozens or even hundreds of magnetic tape segments, and sometimes run dozens of tape players with looped tape segments simultaneously, to achieve this kind of sound collage. Happily, with digital music and editing tools like Audacity, we can achieve complex collage soundscapes with relative ease. Consider the following example:
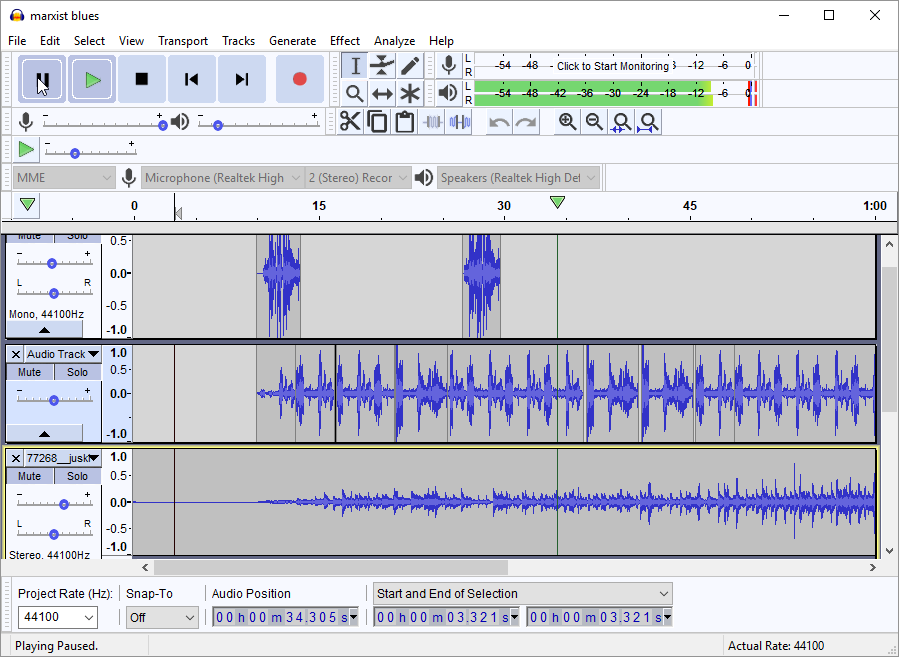
Visible here are the top three tracks of a five-track audio project I created. It is structured around two main elements: a blues-guitar segment (third track down, duplicated once end-to-end to produce the overall song length), and the purring and vocalization of an old cat named Marx, from an originally quite short sound recording which has been edited and duplicated numerous times in track two, resulting in a continuous 1:45 audio track of purring punctuated by a short plaintive meow at regular intervals. The short, intense waveform segments pictured in track one represent the sound of a spoon dropped on the kitchen floor, an incidental noise in the original Marx recording that I picked out, amplified and used for further periodic punctuation. As with any other kind of collage, audio collage like this either 'works' or doesn't for a given listener; you can decide for yourself in this case: https://www.youtube.com/watch?v=oaqPzmURSMo . The point here is simply to illustrate the enormous scope for creativity made possible by the relative handful of editing tools we have surveyed in Audacity so far.
Splitting Stereo Tracks and Combining Mono Tracks
Sometimes when you are recording you may only record one channel of your track correctly; or there may be some other reason that you want to only work with either the left or right channel.
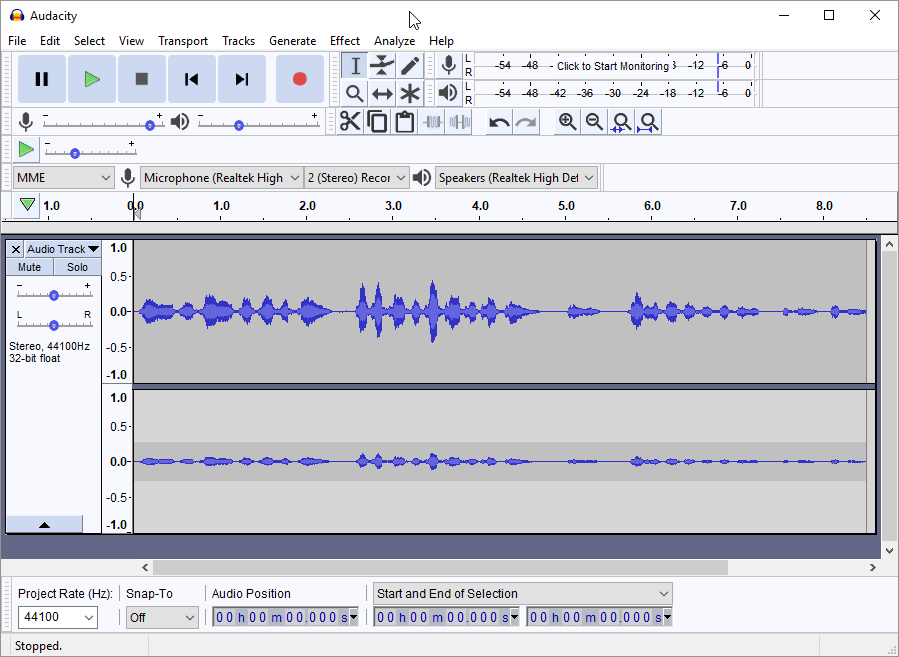
Below we see a recorded track with one channel (the left) much louder than the other:
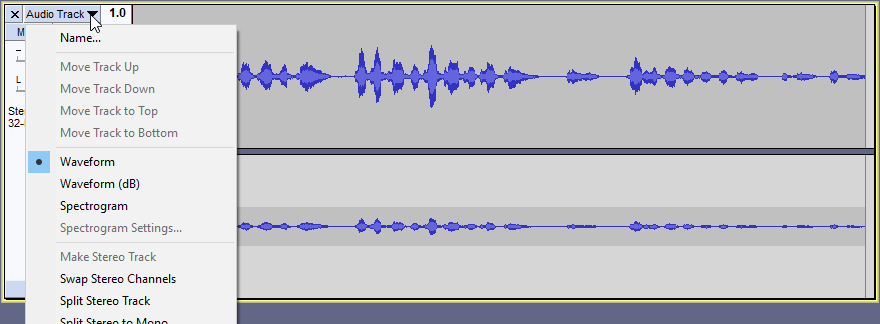
Rather than re-recording, we are going to work on only the left channel (the top one). So we need to select 'Split Stereo Track' from the drop down menu we can invoke by clicking on the track Name:
We can then delete the Right channel signal, as it has now become a separate track. Do this by clicking on the X to the left of that track's name:

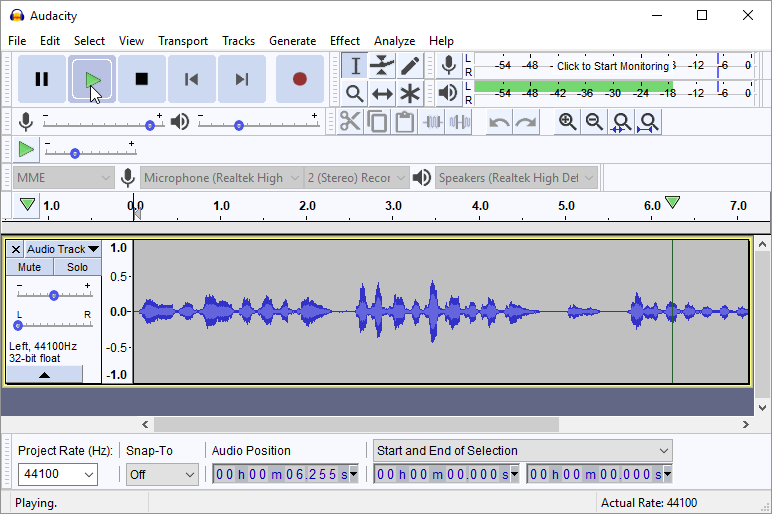
If we now play the one remaining track, we'll be able to hear that the sound is only coming through one channel (L). This can be seen in the green signal of the Playback meter in the screenshot below:
We will also notice that the Pan slider of this track is all the way to the Left (this happened as soon as we split the one track into two, with the second track's Pan slider all the way to the Right). So to fix this, we can simply move the slider to the middle, and the track will now play the same mono audio signal through both L and R channels.
If you need this track to be rendered in stereo again, there are several ways to do this. First, you can simply Export the track (File > Export) as an MP3, which will open a dialog allowing you to choose a Channel Mode of Stereo or Mono (see next chapter for details on Exporting). Of course, in that case the two channels will be identical as they will have been derived from the single mono track.
If you wanted instead to have two channels that you could edit or apply effects to separately, you could select the entirety of this track, then go to File > Duplicate, which will create a separate, identical mono track below the first one. Once you've edited one or both mono tracks to your satisfaction, you can recombine them into a single, stereo track by going again to the track dropdown of the top track and selecting Make Stereo Track:

Of course, the Make Stereo Track function will also work to combine any two mono tracks that are directly adjacent in your Audacity, even if they have separate origins. Just keep in mind the basic function of stereo sound: any L and R channels that are not perfectly synched up metronomically, and otherwise musically coherent, can make for difficult listening.