Introduction to Video Editing With ShotCut
Getting Started: Opening a file and adding it to the Playlist and Timeline
In Shotcut, we can open a file either by using the Open File button on the control bar, or via the top dropdown menu by choosing "File" > "Open File..." Either will invoke your standard file-browser window, allowing you to navigate to and select a file to open:
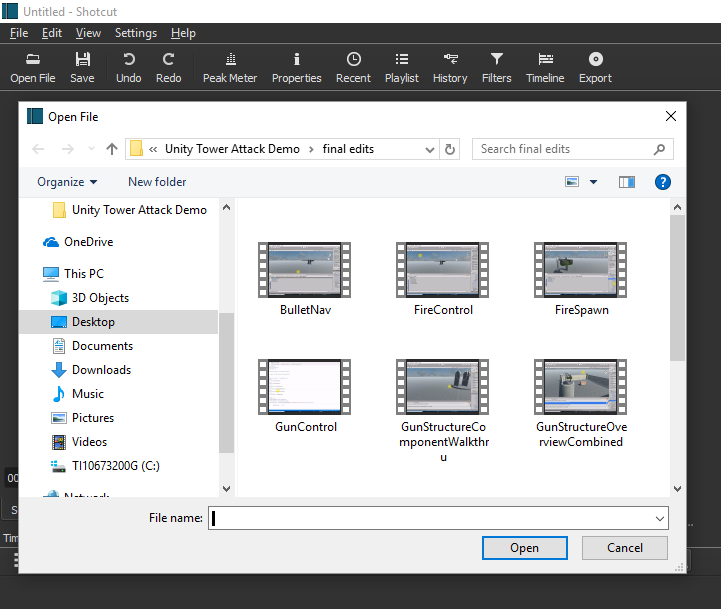
Here, the file browser has taken me by default to a location where I have previously been saving video tutorial videos I've edited in Shotcut. However, for this demonstration let's choose something different: a brief clip of 'raw' iPhone footage of a waterfall in Iceland. I've saved it to a folder one level up from the first one:
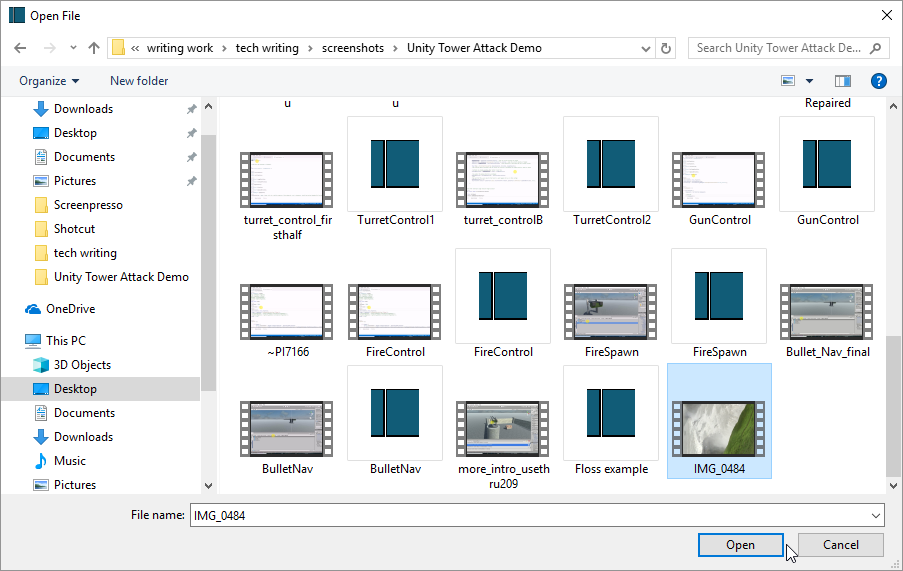
The video in question is simply named "IMG_0484", and is clearly marked by its icon as a video image--in this case a .mov file, though many of the adjacent files are mp4 video files. Notice, however, that there are also a number of files here marked with the distinctive blue Shotcut logo. These are not video files as such but Shotcut project files I have previously saved from working on my video-tutorial series, and which I could also choose to open this same way. If I did so, however, they would open an entire project, with the Shotcut UI displaying all of the media assets and video and audio tracks I used in that project, exactly as I last left them. We'll save that for another time, and instead open the 'raw' waterfall footage:
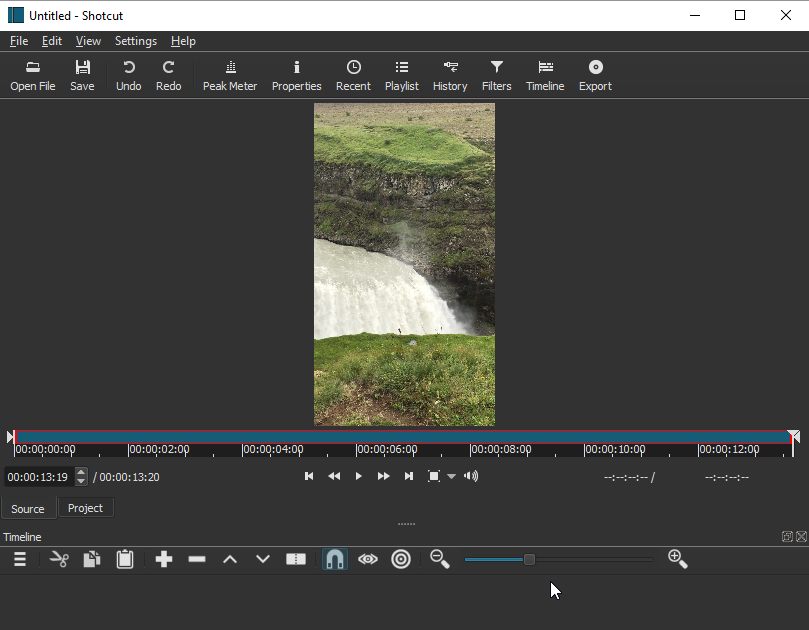
As soon as I open the waterfall video it immediately displays in the central panel of the Shotcut UI (called the Source panel) and begins playing; in the screen shot it has played to the end, and you can see that the full video is only a bit over 12 seconds duration. At the bottom of the Source window are some familiar video controls, which we can use to rewind the video, play again (or pause), fast forward, let me zoom the view in or out to various percentages between 25% and 200%, or show the Volume Control (which by default will be set to whatever the full volume of the audio is, if audio is present). One thing immediately clear here is the tall, narrow 'aspect ratio' of this video, which was shot with an iPhone in vertical or 'portrait' orientation: if I were to make this part of a longer video sequence I might want to add a crop filter to this clip so that it fits in better with other clips that have more of a 'landscape' orientation.
However, I cannot do any such editing operation yet; so far, this video is merely a "source" that I can evaluate for inclusion in my project (in whole or in part, as we'll see in the later chapter on "Clips"). To make this file an actual editable asset, I need to add it to my Playlist. I will do that by first opening the Playlist panel, by clicking on the Playlist button in the top Toolbar (you can see that button here, 5th from the right in the toolbar). At this point the Playlist will still be empty:
![]()
The empty Playlist panel displays a number of useful instructions--but not, interestingly, how to add an item in the first place. We do that by clicking the white + button at the bottom left of the panel. This will add whatever is currently displayed in Source into the Playlist, which now displays as follows:
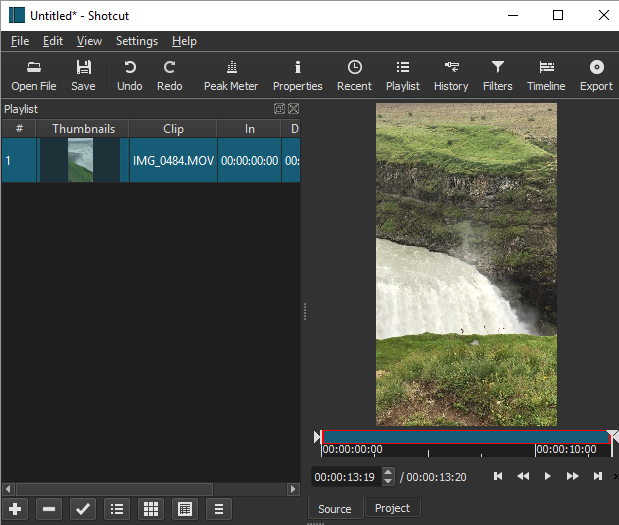
My waterfall .mov clip is now displayed as an item (here the sole item) in the Playlist. Shotcut now considers this an asset in the project proper (a project still called "Untitled*", we might notice, because I have not yet saved it as a Project file; we'll probably want to do that before we put too much editing work in). Now that the clip is in the Playlist, we could immediately start modifying it from there in a number of ways. For example, after first clicking on this Playlist item to select it (it will turn blue, as shown, at that point), I can now click the Properties button in the top toolbar to display the Properties Panel, loaded with the properties of this waterfall clip:
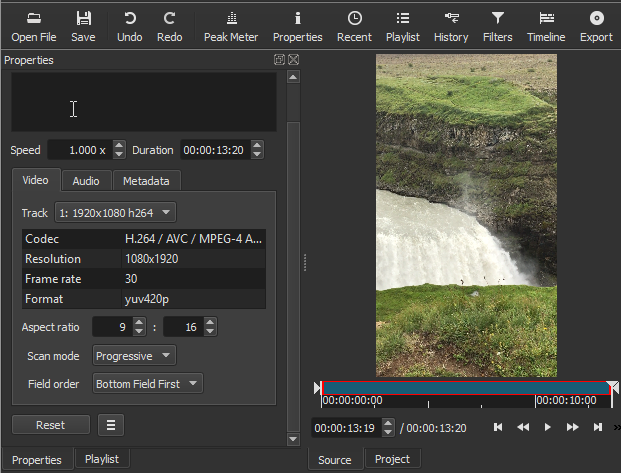
Note that the Properties panel has displaced the Playlist panel itself in this part of the overall UI, but the latter panel is still open, and is accessible by way of the tab now displayed at the bottom of the Properties panel so we can toggle back and forth between the two. Meanwhile, we can see a variety of properties for this video file, some of them fairly familiar--the clip's duration, its resolution in pixels and precise aspect ratio--and others more esoteric: the codec used for encoding this file, the frame rate (30 frames per second, or close to that of cinema-quality film), the format code, the scan mode. And this is only in the "Video" tab of this panel: the "Audio" tab would display various properties of the clip's audio, if it is present (as it is in this file).
As will be the case at numerous points in your exploration of Shotcut, some of the information you're presented with here may mean nothing to you, but that doesn't matter as long as you don't fiddle with settings you don't understand: at any point in the workflow where a choice has to be made, Shotcut will default to a sensible, middle-of-the-road choice: it is a tool designed for both absolute beginners and users with deep knowledge of video formats, encoding, and other aspects of video editing. Right now, for example, we could already change certain properties of this clip, including the speed of play, the clip's duration and even the aspect ratio itself (though doing it here would mean distorting the actual image -- to achieve the same effect it would probably be wiser to add a crop filter instead). Indeed, with this clip now in the Playlist, we could open the Filters panel and begin applying multiple filters to the clip. But that would probably not be wise either, until we're able to step though this clip in much finer detail, and determine exactly where, why and how we might want to apply any of the effects made possible by Filters in Shotcut. And to do that, we will need one more step: adding this clip from the Playlist to the Timeline.
Typically, the Timeline panel will open automatically when you first open a video file, as it did when we opened the waterfall video above. If not, you can open it via the Timeline button in the top toolbar. The Timeline panel has its own set of controls, which look like this:

These controls are itemized in the UI Orientation chapter preceding this one, in case you skipped it, and we'll discuss them again as we need them for specific operations in subsequent How-to chapters. For now all we need is the big + button here (not to be confused with the + button in the Playlist controls, which added items from Source into Playlist--though if you ever do make a mistake like that, just use the Undo button to make it go away). This + button will add any item selected in the Playlist into the Timeline. If there is already a video track in the timeline, and it's selected, the new video clip will be added to that track (or appended to any content already on it). If there's no track present yet, this control will automatically create one, and add the video clip to it at point 0. That's what happens when adding in our first clip of the project, as here:
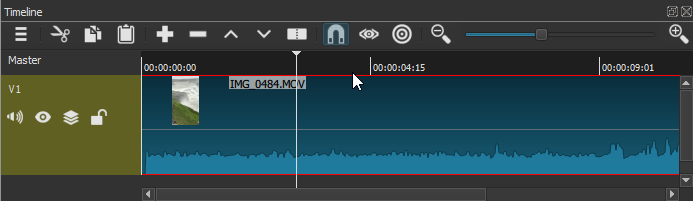
What we see here is a video track, "V1", which Shotcut has created, with the waterfile clip inserted into it starting at point 0. The audio of this clip is also included in the same track (though we could split it off if we wanted into a separate audio track); we can see it as a wave-form at the bottom of the track. Shotcut will now consider this the "Master" track, though we can add as many additional video or audio tracks as we need for the project. Note the scrollbar at the bottom: we are not seeing the entirety of the V1 track in this screenshot, but we're seeing most of it because the full video in this case is only 12 second long. The videos you edit may be much longer, of course, so another very useful set of buttons here are the zoom out and zoom in controls (far right on the Timeline controls), and the slider between them, which allow you to zoom in horizontally in order to see fine details, or zoom out so as to see more or all of a longer track. But what exactly do we mean by 'seeing' the details? In the case of the audio wave, when we zoom in we can literally see the fine details of the wave-form itself:
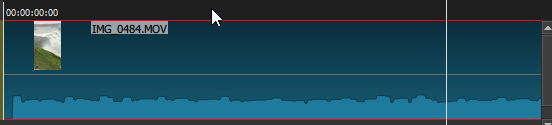
These details are not especially varied or interesting in this particular case, since this is simply the roaring sound of the waterfall recorded with the video; but with something like a voiceover or music sound track, one can easily differentiate individual sounds or words in the wave-form shape, and therefore decide exactly where to edit the sound track, if necessary. But what about visual details? Here we must understand that this video track, once loaded, is now what 'plays' in the main video window. We can use the video play controls that we saw when we first opened the file as a Source; but much more useful in this context is the Playhead, the vertical white line visible in the last two screenshots, with its triangular drag-point at the top visible in the first one. With this drag-point, we can use the mouse to drag the playhead to any point, and over any segment, of the track, and the video window will display whatever video content the playhead is over at the moment--right down to individual 'frames', of which we know there are 30 per second in this video, if we wanted to zoom in that far. We can also use the left and right arrow keys on the keyboard to step, in tiny intervals, forward and backward through an area of track. As we do this we will hear the corresponding audio for these precise places as well, unless we chose to mute it (the mute button is the furthest-left of the track controls). This dramatically slowed or backward audio this can be a disconcerting experience at first, but it's actually an essential aspect of fine-grained audio-visual editing.
All that remains is to note that the position of the Playhead also determines precisely where many editing actions will take place, such as splitting a track, or pasting the beginning of a copied segment. But now that we have a clip of media content in place for editing, we can consider some basic editing functions in the next chapter.