UpStage v3 User manual
Uploading Media
The following media formats can be uploaded to UpStage:
- audio: mp3 ONLY
- graphics: swf, png, jpg and gif; swf will give the best quality result, as all files are converted to swf on upload. swf and png will allow for transparency.
You must first create your media in a graphics or audio application, before uploading; please see the section on Creating Media for more information about this.
Note: this page cannot be used on Internet Explorer 7 or below, we recommend using the latest version of your browser to ensure compatibility. If you are unable to update we recommend using an alternative browser such as Firefox or Chrome.
How to upload media

Click on Upload Media in the Workshop navigation bar, and you will see the following screen:
REPLACE SCREEN SHOT
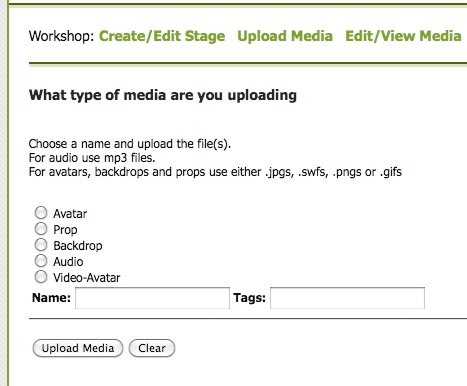
When you click on the radio button for the type of media you want to upload (Avatar, Prop, etc) the screen will expand to provide the upload form.
We will look at each media type in detail.
Upload an avatar
When you select the Avatar, the screen will expand to give you the form below:
REPLACE SCREEN SHOT
![]()
Enter a name and any tags you want to attach to this media item (tags can help you to find a media item later) then click Browse to navigate to where your media item is on your hard drive or online.
Avatar voice
Select a voice for your avatar from the dropdown menu of voices. To hear what each voice sounds like, click Test Voice (you can change the text that will be spoken in the input box). There is more information about the different voices in the appendix Text2speech Voices.
Streaming Avatars
A stream avatar enables an audio-visual stream to be displayed on the stage. See the section on Streaming for information about how to do this.
Multi-frame avatars
One way to create animated or multi-frame avatars is to use an application such as Flash that can generate a multi-framed swf file. Another option is to create multi-frame avatars in the upload process. You will need to prepare each frame beforehand, making sure that each image is the same size, then upload them using the number of frames dropdown menu.
- Select the number of frames you require, which will create additional fields below Filename 1: for each frame.
- Click Browse to navigate to the file that you have created for each frame of the avatar.
Assign to a stage
You can assign your avatar to any of the existing stages as part of the upload process:
- Click on the name of the stage in the Unassigned list to select it.
- Click on the arrows to move it to the Assigned list.
Upload!
When you're ready, click Add Media to upload your media. If you've forgotten to enter any required information - such as a name - a dialogue box will prompt you. You can also change information later by editing your media.
Upload a backdrop
Backdrops work in the same way as avatars; select the Backdrop option and the form is the same, minus the voice selection and test and streaming options.
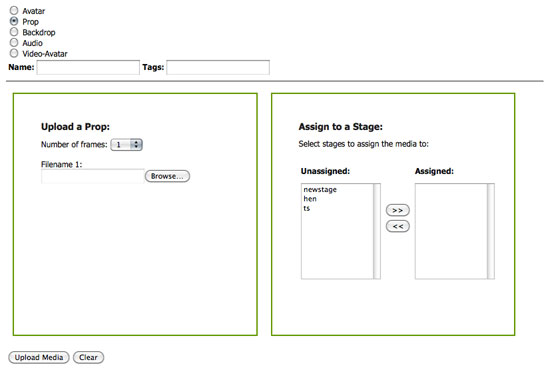
Upload a prop
To upload a prop, select the Prop option and you will see a similar form to that for uploading a backdrop, minus the multiple frame option.
REPLACE SCREEN SHOT
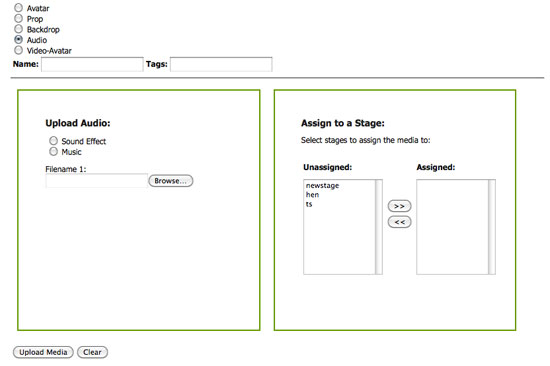
Upload an audio file
Select the Audio, navigate to find your file, and select any stages that you wish to assign the audio to. The only difference this time is that you are also asked to select either Sound Effect or Music as the type of audio file. Audio files MUST be MP3.
REPLACE SCREEN SHOT