Learn JavaScript with Phaser
Game State & Game Code Structure
Change is hard. Changing our toolset is especially hard when it comes to code. We get used to a particular way of working and it's hard to give that up.
Mick Chesterman, a facilitator of game making workshops has this comment - "When I'm working with groups and we have to restructure to make progress it can be a shock. They sometimes feel that they have an understading of how the code is working that disappears when we start to make alterations."
The good news is that we know enough to create a structure which while not perfect will work well enough to complete a game. The key bit we now need to know how to do is to add in new Game States.
Understanding Game States
Planning our game states
When we were first planning a game, we had to answer questions like. "What is the Goal? What are the Rules? How can you win? How can you lose?". This leads us to think about different stages or states of our game. If we sketch them out we may come up with a sketch a bit like this one.
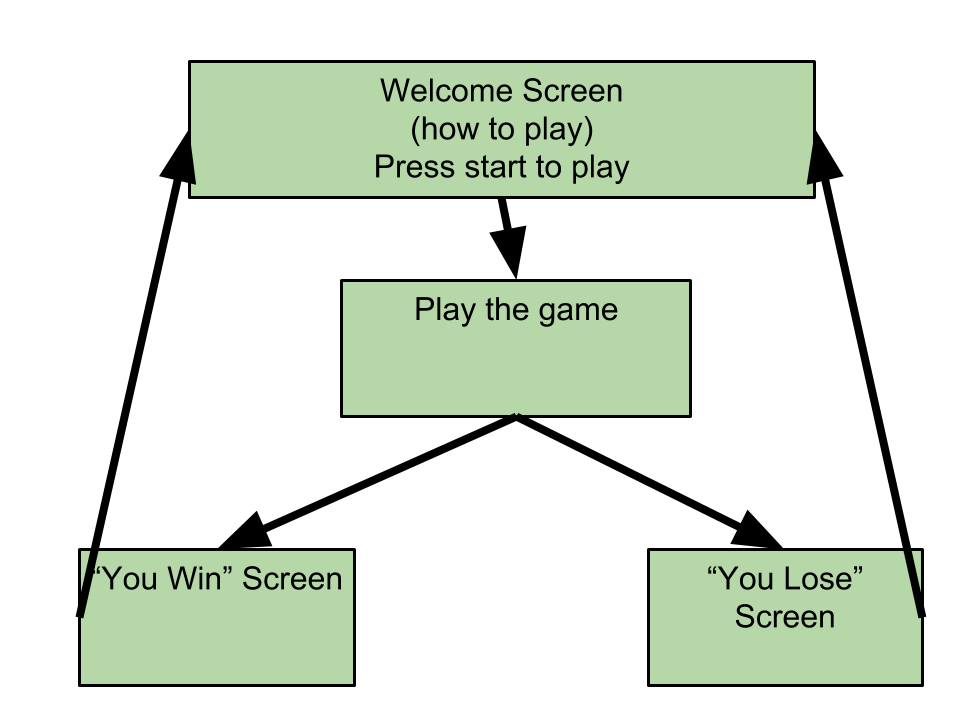
We can now start to build on that plan to add these different states into our game.
At the moment we only have one state our "Play" state. In the code this is an object called playState. In this chapter we create a different state for all of our game stages in the diagram above.
Hands On: Adding a Game Over state
At the moment our game only has one state, the play state and there is no code to say when the game has been finished.
This means that when the game mission has been completed there is no way to restart it apart from to click on run again in codepen or to refresh the internet browser window.
To solve that let's add code which recognises an end condition shows a game over screen and then restarts the play game state.
Let's check for when there are no more coins on the screen and begin the game over state.
Create a Game over State
We can create a new state object after our play state. We can look back to the chapter on building a world. To copy the same structure. For example here we can start by typing the following code after the playState functions and before the last lines of of our phaser code.
Let's keep the game over screen very simple and just add some Game Over text and a Timer to restart the main play state after 3000 miliseconds (3 seconds).
    var gameOverState = {};

    gameOverState.create = function () {
        this.gameoverText = game.add.text(10,10, "Game Over", "0:00");
        this.gameoverText.fill = "#ffffff";
        this.time.events.add(3000, this.restart, this)
    };
    gameOverState.restart = function(){
        game.state.start('play');
    };
These lines of code are similar to the approach we used when calling a function to restart the game when we hit an enemy. The timer event takes three parameters, the time to run, what code to run, and the what code to run it on, in this case this object the gameOverState one. There's a bit more on this at the end of the chapter.
Future down the code right at the end you will see a line about game.state.add for our play state, Just after that you can add one for game over state
    game.state.add("play", playState);
    game.state.add("gameover", gameoverState);
    game.state.start("play");
In summary we have you can see we are added the game over another state but still starting with the play state.
We also need to change what happens when the game is over.
In the hitEnemy function and the checkAlive function replace the lines referencing restarting the game with the following line;
game.state.start("gameover");
In fact, you can get ready for adding other states to our game. To do this add the following code to the end of your code.
    //game.state.add("start", startState);
    game.state.add("play", playState);
    game.state.add("gameover", gameoverState);
    //game.state.add("youwin", youwinState);
    game.state.start("play");
We have states here for two more states, one for an opening scene or starting menu called startState and nother called winState for if you win the game.
We haven't written or added these state objects to our code yet so they are commented out. But you can follow the same pattern or look at the final project in the chapter to see how they might be implemented. Also there is a chapter specifically looking at creating a starting Cut Scene elsewhere in this book.
Check your Code
You can check your code against this chapters code demo here https://glitch.com/edit/#!/game-over-state-add?path=game.js
Hands On - Creating our Starting Cut Scene
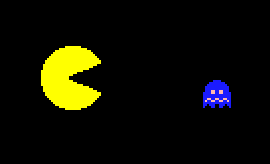
Cut scenes are the little bits between game levels. In one classic early cut scene Pac Man is chase off the screen persued by a ghost but then returns having grown in size to chase the ghost back. These scenes act as an introduction or break up game play and serve other purposes like "scenes could be used to show conversations between characters, set the mood, reward the player, introduce new gameplay elements, show the effects of a player's actions, create emotional connections" etc 1.
If we are working as a team,then this is also a great project for someone who is drawn to the art and narrative side of game to sink their teeth into. To create cut scenes we'll be learning more about animation using tweens and timing.
Start with this starter project which is the base our the hands on example. https://glitch.com/edit/#!/cut-scene-starter?path=game.js:15:0
This project has a similar structure to the game we have been working on but it is going to be a different object called startState (as well as a minimal playState). Have a look at the code to see the familar pattern of preload, create and update functions.
Adding Timer Events
To tell a story using a cut scene we are going to move our character and get them to say things one after the other. To do this we are gong to have to understand time events to say when something will happen
Add the following code to the create: function to add our characters to the game but set the visibility to be false so it don't appear right away.
    player = game.add.sprite(20, 215, "player");
    player.animations.add("right", [1, 2, 3, 4], 6, true);
    player.scale.setTo(1.5);
    player.visible = false;
One second after it loads after our game loads we want to show the image of our player which is now a space person. To do this we will add a thing called a time event to the game. Add this at the end of the create function
game.time.events.add(1000, this.playerShow, this);
This function, at a very simple level like this, uses three parameters;
- the time when you want something to happen
- the name of the function you want to run
- the context you want the function called in (don't worry to much about this bit it's normally just this)
We now need to write the playerShow function and add it to the startState object.
     startState.playerShow = function() {
        player.visible = "true";
    };
Run the code by clicking on Show Live to see the result
Adding Movement via Tweens
So far so good. Now let's get this player to move. We'll repeat the process above by adding a timed event which calls a new function, and then writing this new function which will move our player. Add the following line to create function
game.time.events.add(2000, this.playerMove, this);
This will start the player moving two seconds after the start of this startState.
Now let's write this function to use a Tween to move our player sprite.
startState.playerMove = function () {
    var tween = game.add.tween(player);
    tween.to({x: 70, y: 215}, 1000, null, true, 0, 0, false);
    player.animations.play("walk");
};
Here we create a tween and set the tween to parameters, this process is outlined in the hazards and enemies chapter of this book.
We also start the player animation of our character walking.
Relative Positioning and Text
Now let's make our player say something. We'll repeat the same process as above.
game.time.events.add(3000, this.speech1, this);
And then write a function which will show a speech bubble graphic as described in the section below.
startState.speech1 = function () {
    player.animations.stop();
    var speech1 = game.add.sprite(player.x - 70, player.y - 50, "speech1");
};
Under the Hood - Using the "this" keyword
There are different ways we are using the this keyword. In Javascript this is s a keyword related to context. What does that mean? For us here in practice it means we don’t have to list all of our objects at the begining of our code as we have been doing. And it is a way of being sure that the code we run is run on the right thing. It’s neater in terms of keeping our code variables working correctly between different functions but it can be confusing to really understand in full. If you want to follow this up then do some searching on the keyword of scope as well.
For this reason, up until this chapter we have tried to avoid the use of the this keyword in the examples. But you do come across it here. At this stage of us learning about coding we can say let's not worry too much about this. Let's recognise it and follow the patterns of how it is used in examples for now.
Check your Code
You can check your code against our completed example here - https://glitch.com/edit/#!/cut-scene-tween-demo
Hands On - Creating More Graphical Assets
Part of the fun o of making your own games is to create your graphics and characters. There are many tools to do this available online for free download, and some which allow you instant creativity by allowing you to work in your web browser. Here are some of the tools we use.
Creating Pixel Characters with Piskel: We have already played with Piskel to create our own characters. You can create all sorts of pixel art for your cut scene using this tool.
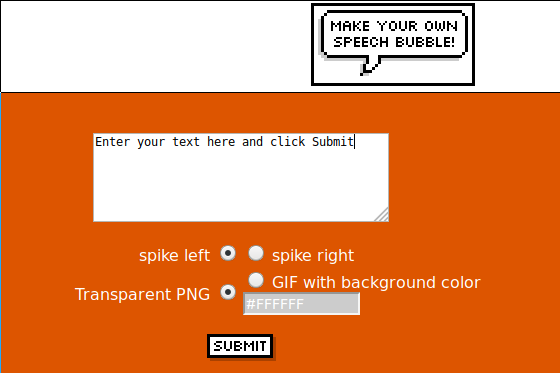
Creating Speech Bubbles with Wigflip: This fun website does a good job of creating simple and quick pixel art speech bubbles
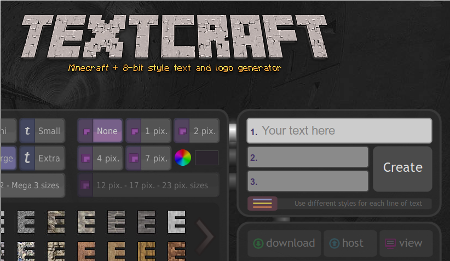
Creating general text at Textcraft: This is a fantastic and very flexible site for creating funky looking game text graphics. You must try it.
Next Stages: Summing up and choosing your own adventure
We have picked up a lot of of knowledge by following the stages in these chapters to build up a game from scratch. This cover the following elements;
- understanding the structure of a core game functions; preload, create, update
- loading images and sound into our game in preload
- adding images and sound to our game stage in create
- setting properties of added elements like that of the player for example gravity
- adding sprites to a group that to let us make them behave the same way
- working groups and spirtes using collisions and overlaps in update
- defining and calling our own functions, for example takeCoin or hitEnemy
- creating new Game States to allow us to create end screens and starting screens
Now that you are able to use these element you are ready to choose the next path for yourself. The following parts of the book are self contained chapters or challenges that you can set yourself and implement in any order you choose. Read the next section on Game Mechanics and Game Polish to find out more.
As a final part of this section, there is an example of a working game which uses some of the following elements; adding a timer to the game, jumping on enemies to zap them, adding a starting screen with animations, making the game full size.
You can have a look at the code underneath by clicking on the Glitch Fish and selecting Remix or read on to the chapter on Game Mechanics to see how to add these elements to your game.
Many thanks to Belen Albeza from Mozilla for her work on a platformer tutorial using Kenny's graphics. I've used the ideas and the game art a lot for this example. That tutorial is a great next step if you want to take the knowledge from this beginner book further. It is also structured in a way more like a web professional would do it.