Learn JavaScript with Phaser
Adding a Reward
In the last chapter we talked about not having a real goal for our game. Yes, that was a problem. In this chapter we put in place a reward, a goal for us to chance. In this case it will be to collect coins.
Hands on: Creating our Coin
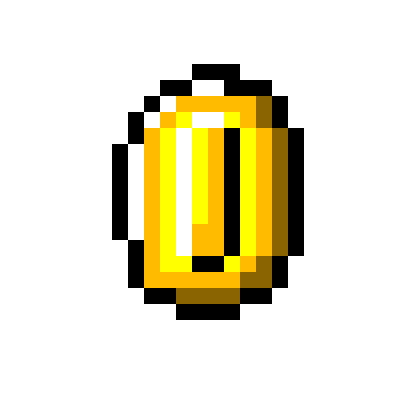
We already know how to add images as sprites to our world. We did that with the player. Now we need to do the same a coin. But we can go one step further and add a simple animation to the coin. animation of a sprite is a good way of letting the player know that this is an active object in the game rather than part of the scenery. This involves adding it in a slightly different way.
To make our image animated we change the way we add our image. We add it as a spritesheet, and specify the width and height of each frame in that line too, this this case 22 pixels wide and 22 high.
In the preload function add the following code
game.load.spritesheet("coin", "https://cdn.glitch.com/5d318c12-590d-47a1-b471-92a5dc0aae9d%2Fcoin_animated.png", 22, 22);
Before adding any coins to the game. We are going to create a group for all of our coins called, coins, this will be useful when we programme the part of the game where the player takes the coin. Generally we might want to create groups of objects when we want the same kind of thing to happen to all the members in the group. In this case each time our player touches a coin we will want that coin to disappear.
Add the following code in the create function in our code after where we add the platforms.
      coins = game.add.group();
      coins.enableBody = true;
Instead of adding all of our coins one at a time, which we can see would be quite repetitive, we can use a loop to do the job for us. Let's add 3 coins to the screen, spaced every 100 pixels. We will add them at the top, but then add gravity so that they fall down until they touch a platform.
To do this add the following lines after the code above.
    for (var i = 1; i < 4; i += 1) {
        var coin = coins.create(i * 100, 0, "coin");
        coin.body.gravity.y = 200;
        coin.animations.add("rotate", [0, 1, 2, 1], 6, true);
        coin.animations.play("rotate");
    }
Hands On: Making the coins disappear
At the moment we have something for our player to head for but when they get there, they just overlap with the coins rather than it seeming like the player takes them. Our next stage is to make them disapear.
To do this we rely on another bit of Phaser physics which is expecially for cases like this. Add the following code at the top of your update: function.
game.physics.arcade.overlap(player, coins, this.collectCoins);
This line will be explained at the end of this chapter but what it means is that when player and any member of the coins group overlap then run a function called collectCoins (which we still have to write yet).
Now let's write the code that runs when that overlap happens. Add this after the update: code has ended.
playState.collectCoins = function (player, coin) {
    coin.kill();
    coinSound.play();
};
Now that we have a means for the rewards to dissapear when the player touches them, it makes sense to count how many coins are left, and when there are none left to do something. In our simple example let's restart the game. We'll need a new function to count the coins add the following line to the end of the update function.
this.checkAlive(coins);
Then add a totally new function after the playState.collectCoins one by putting in this code.
playState.checkAlive = function (group) {
    var count_alive = 0, i;
    for (i = 0; i < group.children.length; i += 1) {
        if (group.children[i].alive === true) {
            count_alive += 1;
        }
    }
    if (count_alive === 0) {
        game.state.restart("play");
    }
};
Adding these lines of code could be a bit tricky to get in the right place. You may want to use the Check Your Code section to help you.
Hands On: Adding a sound
Adding sounds is fun and pretty easy to do and we really need that right now to give a bit of feedback to the player that they are on the right track.
Follow these steps which should be starting to be familiar
- create a global variable at the start of the code
- load the sound in preload
- add sound to the game in create
- add code to play the sound when the coin is collected.
var coinSound;
game.load.audio("coinwav", "https://cdn.glitch.com/f555a7cf-4ed2-4768-8167-e545853a6981%2Fct_coin_1.wav");
coinSound = game.add.audio('coinwav');
playState.collectCoins = function (player, coin) {
    coin.kill();
    coinSound.play();
};
Checking our Code
You can check what you have in your code with the the completed code for this chapter here - https://glitch.com/edit/#!/add-a-reward-chapter?path=game.js:1:0
Have a Play: with Sounds and Art
Challenge One: Alter the coin art
Your challenge is to change the art of the the animated coin.You can replace it with anything that you imagine our player might want to collect. Let's call it a reward from now on.
Remember in the first chapter Jumping Right In we altered art and brought it into our game. In that chapter we used a bit of a sneaky short cut but now is the time to really learn how to do that well in our code playground. You can follow the instructions in Jumping Right In to learn how to create your animated reward. If you want to make your life easier you can keep your reward the same size and length of animation. The two relevant lines are
game.load.spritesheet("coin", "https://cdn.glitch.com/5d318c12-590d-47a1-b471-92a5dc0aae9d%2Fcoin_animated.png", 22, 22);
which tells us that our original coin art is 22 pixels wide and 22 pixels high and the line
coin.animations.add("rotate", [0, 1, 2, 1], 6, true);
which shows us that the animation using three frames to make it seem like the coin is spinning.
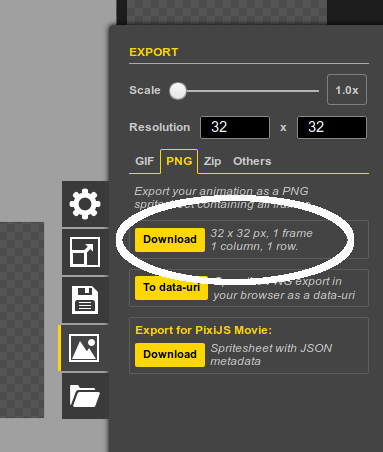
When you are finished designing your new reward you now need to download it to your hard drive as a PNG file.
Next you can click on the assets part of your glitch project and drag that downloaded file into that assets window or browse for it on your computer but clicking on Add Asset.
When it is uploaded click on it and then click on the Copy Url button. You can now go back to your game.js file and paste in the URL of your uploaded reward art into the relevant part of preload. Make sure to change the numbers in the code shown above in this section if you have changed the image size or number of frames.
Challenge Two: Add our own sound effects
Our game now plays a sound when we reach a coin. This means we can play around with making our own sounds and upload our own version.
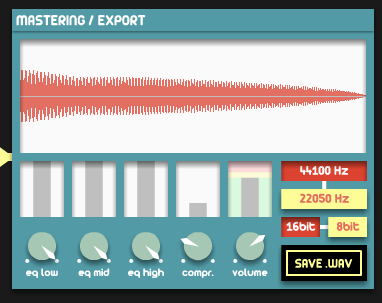
Create your own sound anyway you want but one good online tool is ChipTone - http://sfbgames.com/chiptone/
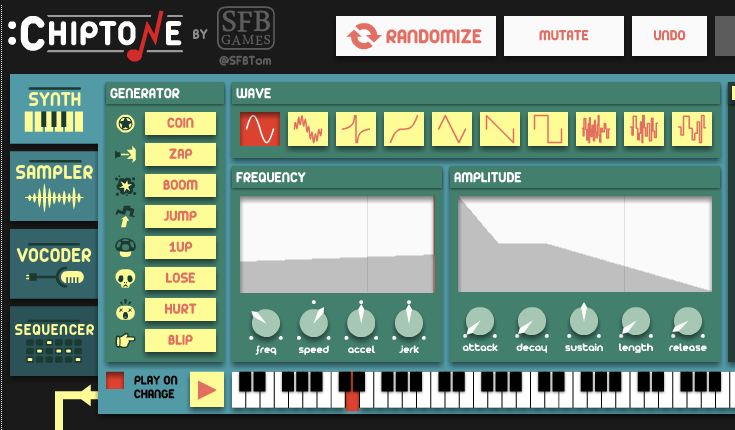
Play around and when you ahve a sound you like click on SAVE WAV to save the sound to your computer
You can follow the instructions for the section on changing your reward image to upload your sound to the assets section of your Glitch remix project and change over the URL of the coin sound in the preload section.
Bonus Challenge: Can you add another sound which plays when your character jumps?
Under the Hood: Loops and Iterating
When find ourselves doing the same thing over and over again when coding, there is normally a better way to do this. At times in this guide we do things the longer way in order to make the code easier to read but here we use a loop when creating our coins.
There are a few ways to do this but one of the more flexible ways is to create a For Loop which takes three statements.
Here is a summary of some more detailed information on how to use a for loop here - https://www.w3schools.com/js/js_loop_for.asp
There are three key parts of For Loop, a starting point, a way of knowing when to end the loop, and a way of changing the loop.
Let's look at a simplified example of how this is used in our code.
      for (var i = 1; i < 4; i++)
        {
          coin = coins.create(i * 100, 0, 'coin');
        }
You can see the first like of the littpt follows the following pattern.
     for (statement 1; statement 2; statement 3)
      {
        code block to be executed (normally more than once
      }
- Statement 1 is executed (one time) before the execution of the code block.
- Statement 2 defines the condition for executing the code block.
- Statement 3 is executed (every time) after the code blocrek has been executed.
- Statement 1 creates a varaible often called i for iterator, (to iterate means to do things more than once).
- Statement 2 sets up when the loop will end using some maths, in this case it will end when i is no longer less than 4.
- Statement 3 runs after every loop and in this case increases the value of i by one each time.
coin = coins.create(i * 100, 0, 'coin');
- Loop One: i = 1 : coin = coins.create(1 * 100, 0, 'coin'); - so coin created at 100,0
- Loop Two: i = 2 : coin = coins.create(2 * 100, 0, 'coin'); - so coin created at 200,0
- Loop Three: i = 3 : coin = coins.create(3 * 100, 0, 'coin'); - so coin created at 300,0
Under the Hood: Making and calling functions
We added our own function to the playState object called collectCoins when the player overlapped with any coins. This is about the most complicated bit of coding we need to do to make our first game so let's take some time to explain what is happening.
When creating our overlap statement the most correct way to do it would be the following line.
game.physics.arcade.overlap(player, coins, collectCoins, null, this);
You may notice that in our game we use a more simple approach which is the following:
game.physics.arcade.overlap(player, coins, collectCoins);
If we are new to code then there is quite a lot going on here. To help explain what is happening we can borrow a bit from the phaser documentation. We will simplify the full documentation which is here https://phaser.io/docs/2.4.4/Phaser.Physics.Arcade.html#overlap
Overlap() is a function with serveral possible paramaters. here we are passing five parameters let's look at them in turn.
overlap(object1, object2, overlapCallback, processCallback, callbackContext)
There is a lot of new information here. We can learn a lot about coding by working out what works and just copying it from one project to the next (especially if we post in forums when we get stuck), so feel free to skip this bit if it is really hard. On the otherhand this is very useful information about coding concepts (and I wish I had understood this earlier), so it is worth reading on.
These different parameters can be likened do different holes in a block toy.
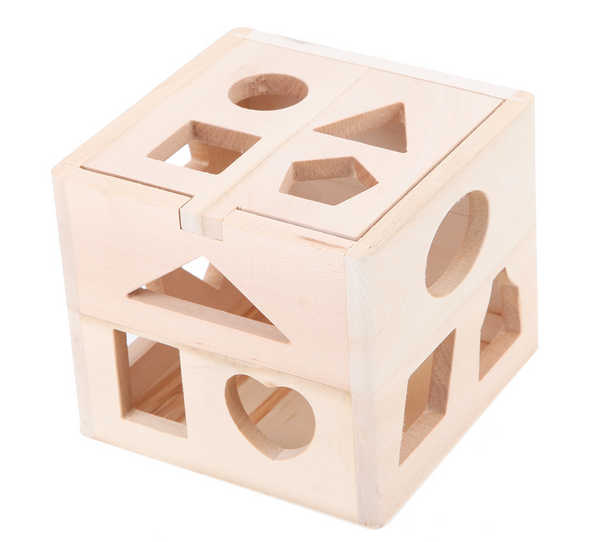
Each function may have several parameters defined and then to use it we need to include variables or other objects in the holes those parameters represent. Let's look at the specification of the overlap function again parameter by parameter
overlap(object1, object2, overlapCallback, processCallback, callbackContext)
- object1: The first object or group of objects to check (needed)
- object2: The first object or group of objects to check (needed)
- overlapCallback: An callback function that is called if the objects overlap. (optional)
- processCallback: A function that lets you perform additional checks before ovelapCallback is called (optional)
- callbackContext: The context in which to run the callback functions (optional)
We can see that some of these paramenters are optional, but we do need to pass in two objects or groups as a minimum. In this case the player and the the group of coins. We also want something to happen when there is an overlap between the player and any of the coins.
This is where the overlap callback parameter comes in. We don't need to know a lot about what a callback function is here. But in a nutshell here is a code that we pass to this overlap function. In this particular case we don't seem to need to include the other options to make our code work. But if we did then we would use the full code
game.physics.arcade.overlap(player, coins, this.collectCoins, null, this);
Although we don't need it, we have to put null in for parameter 4, we can't skip one and jump right to paramater 5 or the function will get confused.