Learn JavaScript with Phaser
Adding Movement
We are going to jump right into making our game move. You will need to have followed chapter on Building a World and have that code ready to follow these stages. See here for the relevant code.
Hands On: Moving our player around the screen
Now we have a player appear, fall from the sky and they should now be standing at the bottom of the game area.
Before we even start adding platforms, let's get our player to move around the screen using the cursor keys on the keyboard.
To move our player we need to start to work with what we call player input, this is how the player of the game interacts with what is happening, in this case we want the person playing the game player to be able to control our game player character using the arrow keys on the keyboard.
Let's start with moving left and right.
Let's add the following code to our update: area.
    if (game.input.keyboard.isDown(Phaser.Keyboard.LEFT)) {
      player.body.velocity.x = -200;
    }
    else if (game.input.keyboard.isDown(Phaser.Keyboard.RIGHT)) {
      player.body.velocity.x = 200;
    }
This seems to work up to a point. Changing the velocity.x property to 200 or -200 when the left or right key is pressed does create movement.
However the player just keeps moving even if we are not pressing down a key.
To avoid this happening we can add one more conidtion to our update area.
    if (game.input.keyboard.isDown(Phaser.Keyboard.LEFT) === true) {
        player.body.velocity.x = -200;
    }
    else if (game.input.keyboard.isDown(Phaser.Keyboard.RIGHT) === true) {
        player.body.velocity.x = 200;
    }
    else {
        player.body.velocity.x = 0;
    };
This resets the velocity to zero and so stops any left right movement. Putting this at the start of the update area means that if no key is being pressed, then this is the default behaviour.
To make our player jump we can add another couple of lines of code.
    if (game.input.keyboard.isDown(Phaser.Keyboard.UP)) {
      player.body.velocity.y = -200;
    }
Now our player can go left and right and jump. This is starting to look like a real game. You may notice that we can jump even though we are not touching the ground. We will solve this issue later.
Make it easy to control our speed
The velocity variables control how quickly the player moves. When we create our game we think it is a good idea to put variables that easily change the way our game works right at the top so it is easy to change them. We did this with gravity last time.
Lets change our code around to do this. This process of improving code that does work but could be better is called refactoring.
In the code above our velocity.x and velocity.y is set in the body of the code. Let's create variables called velocity_x and velocity_y right at the start of our code in our global game variables area.
var velocity_x = 200;
var velocity_y = 300;
Now we can swap out the direct mentions of those numbers from the code in update change the lines as follows. For the x (left and right) value do;
    if (game.input.keyboard.isDown(Phaser.Keyboard.LEFT) === true) {
        player.body.velocity.x = -velocity_x;
    }
    else if (game.input.keyboard.isDown(Phaser.Keyboard.RIGHT) === true) {
        player.body.velocity.x = velocity_x;
    }
For the y (up and down) value
    if (game.input.keyboard.isDown(Phaser.Keyboard.UP) === true) {
        player.body.velocity.y = -velocity_y;
    }
Hands On: Animating our player so it runs
Animating our player so it looks like it is running is made fairly easy by the Phaser framework. If we had to start coding this whole process from scratch then we would be here a long time. Luckily making simple animations is something that many game players want to do so we have some good coding tools for it.
We are are going to work with what is called a sprite sheet.
To understand how this sprite sheet works, first of all we are going to add this to project in the wrong way. Don't worry we'll fix it up quickly
Change the location of the image for the player so that the line reads.
game.load.spritesheet("player", "https://cdn.glitch.com/5d318c12-590d-47a1-b471-92a5dc0aae9d%2Fhero.png?1539353651099")
Now when you Show the Live page you will see the following image of lots of different version of our hero.
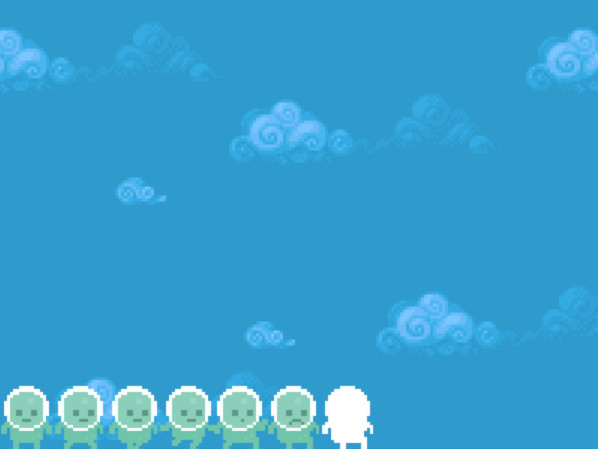
This image contain 7 different versions of our character in different stages of running. It was created by Kenny's Platformer Pack and processed by Belen Albeza for another game tutorial.
We can use these different frames to create an animation in phaser. To do this we need to change the way we are brining this image into the game.
Change the line above to the one below by changing image to spritesheet and adding two extra parameters.
game.load.spritesheet("player", "https://cdn.glitch.com/5d318c12-590d-47a1-b471-92a5dc0aae9d%2Fhero.png?1539353651099", 36, 42);
This bring it in as an image 36 pixels wide by 42 high. Run the code and you'll see that we are back to seeing just one player.
But to make the player seem like they are walking then we need to add some more code to tell phaser which of the frames to use. The following frames tell phaser to use frame one to five when our player is running, and frame zero when stopped so add the following to your create section.
    player.anchor.set(0.5, 0.5);
    player.animations.add("stop", [0]);
    player.animations.add("run", [1, 2], 8, true); // 8fps looped
    player.animations.play("stop");
We'll explain the anchor part in a bit.
Now in the update section we need to activate the walking animations when the cursor keys are being pressed. We also need to tell the animation to stop when there is no key being pressed. To do this alter the user input lines to be the following.
    if (player.body.velocity.x !== 0) {
        player.animations.play("run");
    }
    else{
        player.animations.play("stop");
    }
If the player is moving left or right then the velocity will not be zero, so we start the run animation. Otherwise play the other animation where our character is stopped.
This works but the player is always facing the same way. To flip the player over then add the following lines.
    if (player.body.velocity.x < 0) {
        player.scale.x = -1;
    }
    else if (player.body.velocity.x > 0) {
        player.scale.x = 1;
    }
We can see there that there isn't a flip command but setting the player body scale property to a minus figure has that effect.
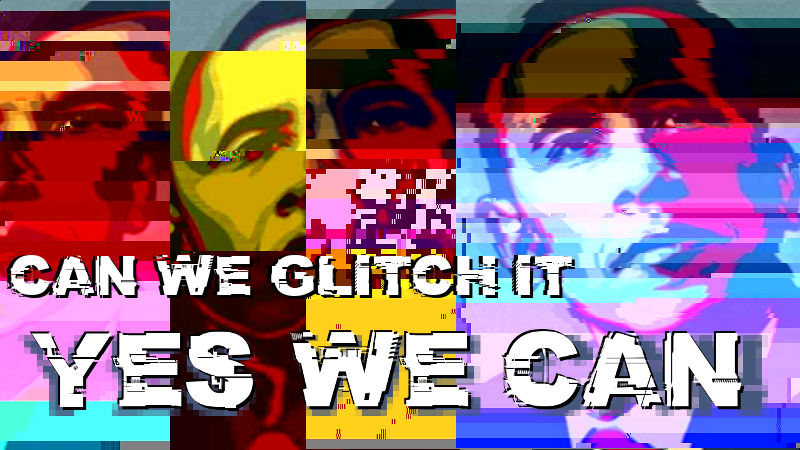
Can We Glitch It?: Yes We Can!
The process of flipping below only works neatly if the what something called the Anchor point of the sprite is set to be the middle of the sprite in stead of the default value of the top left.
This means that we can create an interesting glitch in our game by commenting out the following line by putting // in front of it like so.
//player.anchor.set(0.5, 0.5);
Try it out in your game and see how our hero glitches out.
Have a Play: add your own animated player
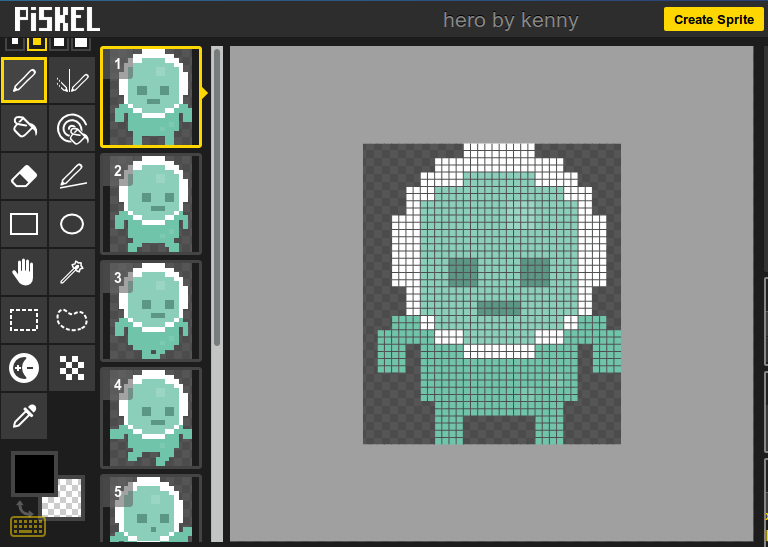
In our first chapter Jumping In we added our own game art to a game using the tool Piskel. We can do the same now but make it an animated character if we want to do so.
Here is a link to the Player character on the Piskel website - https://www.piskelapp.com/p/agxzfnBpc2tlbC1hcHByEwsSBlBpc2tlbBiAgKCogPjNCgw/view
You should be able to click on Edit Sprite to see how the "run cycle" of the hero is made.
There is a great tutorial on the whole process of making a running pixel art character here if you want to go into it in detail. http://www.lessmilk.com/tutorial/pixel-art-run-cycle
In any case you can create your character by adding frames (try cloning them and altering them) and when you are ready export a dataURI image of your animation in the same way you did in the Jumping In chapter and follow the steps above to make it animated.
You may need to change the numbers in your load.spritesheet() and animation.add() functions to match your image. This will be good debugging experience.
Take your time and Have Fun.
Checking our Code
You can check what you have in your code with the the completed code for this chapter here - https://glitch.com/edit/#!/adding-movement-chapter?path=game.js
Under the Hood - if statements / Conditionals
One of the key elements of games are Rules. If this happens then do that.
Let's have a look at first bit the code used to control our player.
    if (game.input.keyboard.isDown(Phaser.Keyboard.LEFT) === true) {
        player.body.velocity.x = -velocity_x;
    } else if (game.input.keyboard.isDown(Phaser.Keyboard.RIGHT) === true) {
        player.body.velocity.x = velocity_x;
    }
Statements here start with if, else if or else. These are also called conditional statements. The format of the first part of a conditional (also called if - else) statement can be expressed conversationally as "if this condition is true, then do this action".
This can be represented in code pattern as
if (condition) {
  action
}
You can see that our code is testing for three statements. This format allows us to programme a series of possible outcomes into our game.
The following pretend code is a summary of what is happening on a game rule level:
if (the user is pressing LEFT) {
  move left and play the suitable animation
}
else if (the user is pressing RIGHT)
  move left and play the suitable animation
}
else (if neither of the above is true){
  stop the animation and show the first frame of the animation
}
The format here is like a list of options which the programme runs. It is important to note that only one of the if, else if, else can run at any one time. You should also know that there can be as many of the else if options as you want.
There is more to explain how the (condition) part of this process works in the next chapter. If you want to follow this up to learn more about this aspect of coding then you can use some of the many online resources that teach javascript. For example, there is more on conditionals here - https://www.w3schools.com/js/js_if_else.asp
Have a Play - Understanding the Game Loop
For the statements above to work and react to the user pressing keys we need to be constantly listening for this "user input" and running the results in our game.
To do this, we put our conditional statements in the part of our code called the update() function. This function is running all the time, or more precisely for or every "frame" that the game runs (normally 60 frames per second).
It is very useful having the code structured in this way. It saves us programming work. One of the reason we use a framework like Phaser is that there are patterns which occur again and again in programming and making games. Listening for user input in our game loop and doing something as a result is one of those key patterns.
Because it is so powerful, we must be aware of what we can and can't put in a game loop. Putting the wrong thing in a loop could cause havoc.
As an example image we wanted to add our player at a random position in the game world but we put the following code in the update game loop by mistake.
      var rx = Math.floor(Math.random() * 400);
      var ry = Math.floor(Math.random() * 300);
      game.add.sprite(rx, ry, 'player');
Because this code is located in your update loop, this would keep adding new images of your players to the game, 60 every second, forever!
Try it out for yourself by adding that code into your update() loop.
You can see a version of a game that does this here. https://codepen.io/mrmick/pen/QVwWax