Learn JavaScript with Phaser
Building a World
Phaser uses a part of the web browser called the CANVAS. You can imagine this as a screen in your web browser window. When we set our project we will create a CANVAS in which we play our game.
We will come back to explain more about how web pages work later. For now follow these sets to get coding your game.
Have a Play: Change the Player Image
Click here for a demo challenge playground in Glitch - https://glitch.com/edit/#!/baw-chapter-have-a-play?path=game.js
Main challenge: change the code which controls what the player looks like and where on the screen it appears.
First click on Remix to make your own version of this project. Then click on Show Live to see a character appear on the screen and float down.
In the middle section of the code find the line which reads:
player = game.add.sprite(0, 0, "player1");
Change "player1" to "player2". Click on Show Live to see a different character appear on the screen. If you already have a browser tab open with your Show Live preview in it click on that tab to see the changes.
Go back to your code and change it again to player3 and click Show Live for another character.
Bonus 1: Then change the numbers from 0 to higher numbers and see how it effects where the character appears. How does that system work?
Bonus 2: In Glitch every line of code has a number. What are the line numbers of the three lines in the code where images are added to the game?
About a Game Area Using a Code Playground
Many web developers use something called a Code Playground to quickly and easily share a working version of their code as a webpage or part of a page. Using Code Playgrounds is much easier then having to have your own webspace. In some ways all code playgrounds are similar. They let you type in some web code and you can see a preview of the resulting webpage immediately. This quick feedback is great for beginner coders. We can see straight away when we have something right or when we have made a mistake that need correcting.
We will use Code Playgrounds as our learning space as we get started. Examples of playgrounds include called CodePen, JSBin, Plunker and the one we are using called Glitch. The look of these playgrounds is similar. You have an editing area for your code on one part of the screen and a preview area on another
Our first job is to create a Game Area on a web page. To create a game area we should decide how big we will want to make it on the screen and also what shape it is. This will be different if we are making a game to play on a computer screen or on a phone screen. In this book we will make games for a computer screen which means we want them to be a bit wider than they are tall.
For our project we will be harking back to a golden age of video consoles the 8-bit of Nintendo and Sega home video consoles. We will create a game that is similar and complexity and graphical style to ones that were played on these systems which were limited to working with Pixel Art to create simple but effective characters and backgrounds.
Game sizes are normally measured in pixels, ie the size of the smallest dot on the screen. Because Mario is such a well know game character we will use this example to get a sense of scale in our game.
Early Mario Bros games had a screen size of 256 wide by 224 high (256 x 224).
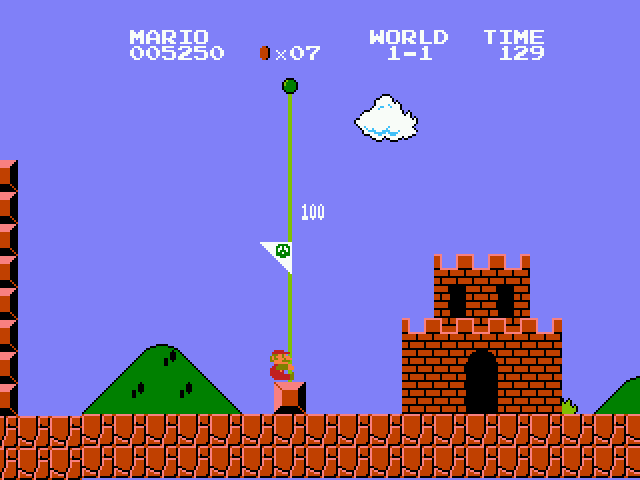
The main character sprite of Mario started out at only 12 pixels by 16 pixels.
Although he did grow a bit when he got a mushroom.
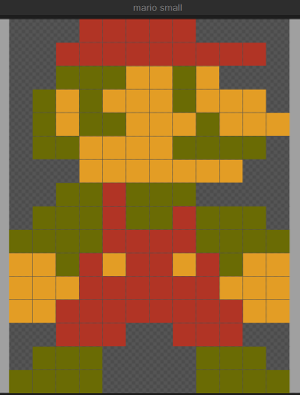
That's really tiny by today's standard. Even at the time it was a challenge to create a recognisable character in such a small size. This is a great piece of pixel art.
Let's increase the game size a bit to 400 x 300 pixels to give us a bit more room to play with when we are creating our own art. Now we know how big our game size will be , we need to create a game space using code.
Hands on - Creating our game structure
One of the great things about using a Codeplayground is the ability to REMIX the work of others and to use existing code as a template starting point. That is what we will do here. Our game will be made up of Javascript, it will live withing an HTML page that will link to the Phaser library and our own Javascript game code.
To allow us to concentrate on only our own Javascript code Remix the following template to create your starter project. Go to this link and click on Remix This https://glitch.com/edit/#!/baw-chapter-starting-frame?path=game.js
At this point you should probably also click Sign In and create an account to save your work.
Now add the following code into the game.js file under the line that says //start your code here
var game = new Phaser.Game(400, 300);
Click on Show Live. You should see a new browser tab open and now see a black area appear on the top left of the screen.

This may seem underwhelming but it's a great step forward. It means that the phaser library is up and running in your page and has created a game space ready for us to fill with interesting things.
We are now going to create a bit of code called an object that will give us a structure for a lot of our most important game elements. Write the following code in game.js undernearth the line your have already written .
var playState = {};
var playState.preload = function() {
};
var playState.create = function() {
};
var playState.update = function() {
};
game.state.add('play', playState);
game.state.start('play');
Let's expiain that code a bit.
The first line creates an object for the main part of our game where we play the game, let's call that playState (we may add a game over and welcome screen later).
The three statements after it add three functions to this object. The functions here form a useful framework for our code allowing us to organise it. The structure is based around when each part of the code needs to run. The sections run in the following order;
- preload: add code here to preload images and other assets for the game
- create: this code runs after preload and is where we add images and other elements to the game
- update: this sections runs over and over again for as long as the game is playing
The last two lines add this code (a state object) to the game and say that this is the first bit of code to run when the game starts. We will explore this more later as we start to add more complicated code. For now we can type it and forget about it for a bit.
Hands on - Adding a background image to our World
Let's add a background image to our game world.
Let's borrow an image of clouds from an official phaser.io tutorial to use as a background. This image lives on the web at the following location.
https://cdn.glitch.com/07341419-e9df-484f-820f-d6799646cfcd%2Fclouds-h.png?1540814965305
To make this our background, first we put the following code in preload:
    game.load.crossOrigin = "anonymous";
    game.load.image("background", "https://cdn.glitch.com/07341419-e9df-484f-820f-d6799646cfcd%2Fclouds-h.png?1540814965305");
The first line of code allows the use of an image from another website. The second line loads that image into phaser and gives it a name of background ready for the next section.
We then need to add another line of code in the create: section
game.add.sprite(0, 0, "background");
This adds that image in the top left. We can imagine it like a maths graph with the 0,0 point starting at the top left of the game.

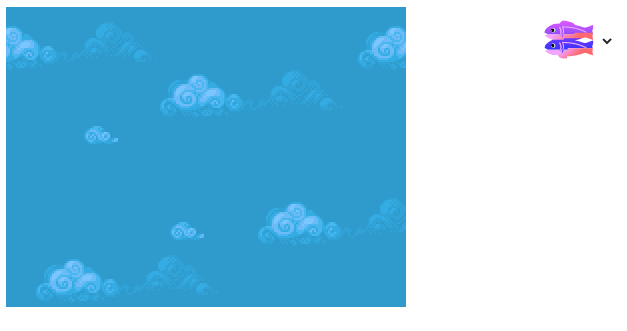
Click Show Live and / or go back to your Show Live tab.
Now you should see those clouds there instead of a black screen.
Hands On: Adding a Player to the Game Area
We can add a player in a similar way. However as we are going to do more with our player we need to change how we add them a bit.
Add the following code above the line where you create the playState object.
var player;
var playState = {};
Putting this line where we list (declare) player outside of the playState means that all the different functions (like preload(), create() and update() will be able to work with it. This will be useful later.
Add the following code to preload()
game.load.image("player", "https://cdn.glitch.com/5d318c12-590d-47a1-b471-92a5dc0aae9d%2Fhero_stopped.png?1539353651204");
And the following to to create()
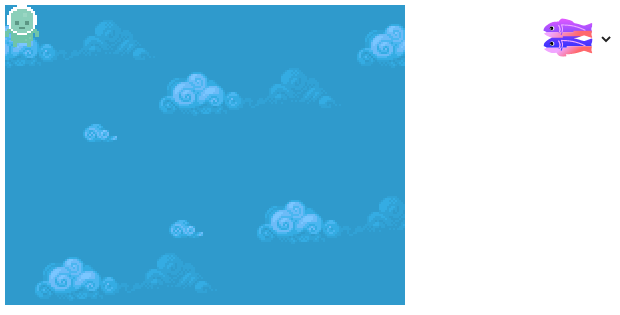
player = game.add.sprite(0, 0, 'player');
Your screen should now show a background and a player added at the top left corner.
The top left of the player is added at co-ordinates x:0 and y:0
Hands On: Adding Gravity to our player
At the moment our Player is stuck at the top of our game. Normally in a platform game gravity acts to pull down our player towards the floor.
We can add gravity to the player to make this happen. Gravity is one of the game elements that are dealt with by the Physics system. To add physics abilities to all the game world elements add the following lines right at the start of the create() code.
      game.physics.startSystem(Phaser.Physics.ARCADE);
      game.world.enableBody = true;
Then add the following line of code in create after where you add player to the game.
player.body.gravity.y = 500;
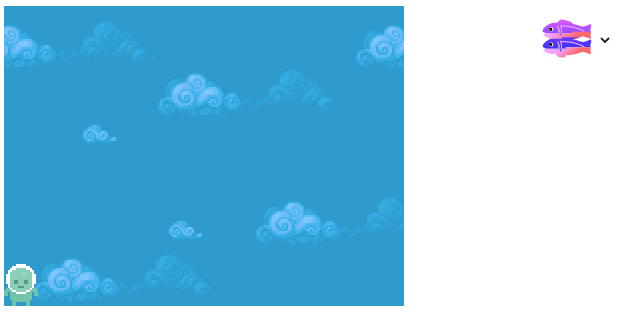
Your player should now fall from the top of the screen when you run your code.
Gravity works! But the player falls all the way off the screen so it is no longer visible. This is not idea for out game. Later will add platforms but for now we will just stop the player from leaving the screen. We do this using the collideWorldBounds capability. Add the following line after your last one in create:.
player.body.collideWorldBounds=true;
The player should now stop when it falls to the bottom of the screen.
If this all seems a bit basic to you Don't Worry we are actually going great guns here! We've already got past some of the biggest barriers to getting started.
Check your Code
If you have followed this chapter correctly should should have some code like the following area - https://glitch.com/edit/#!/building-a-world-chapter?path=game.js
Under the Hood: Understanding Sequencing
One of the key concepts in computer programming is the importance of the sequence of the computer commands that you write and how they are run.
In each of our functions the computer or (js compiler more correctly) will read our code from the first line of the function to the last. This means that it is important to make sure our code is in a logical order. There is a good beginner resources on sequencing here - https://www.bbc.com/bitesize/guides/zsf8d2p/revision/1
To give an example we can look at the lines of code which add
      player = game.add.sprite(0, 0, 'player');

      player.body.gravity.y = 500;
We can see here that first the player is added to the world and second the gravity value for that player is set.
What happens if we swap over the order of these two lines? Let's try it and click on your Show Live tab.
In our the code in the image, the line setting the gravity property is before the line where the player is created and added to the game. This means that there is an error, the screen appears but our player doesn't load.
So our player is not visible. But why? To find out let's hit the F12 key in our Chrome or Firefox browser and look for the Console tab of the developer tools that appear. If you are not using those browsers it's a good time to swap over to them as they are vital for web development like this.
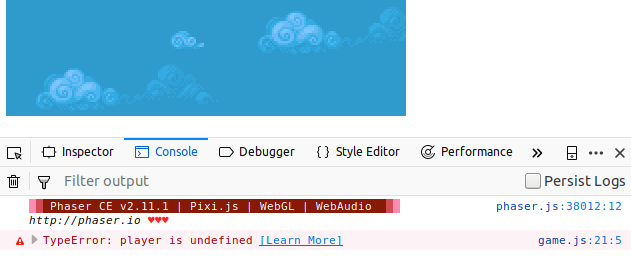
Console is a tool which gives us feedback about what is happening when our code runs. It can be useful in debugging what is happening when our code doesn't work.
Here the message tells us that when the programme got to running line 21 of game that is when the error happened and the player variable was undefined.
Overall, the message here is that we need to have some awareness of what order we should be running different parts of our code and to pay attention to the sequence, the order that we put it in. In addition we can use the console tool to try to help us if we get errors and we are not sure why they are happening.
Under the Hood: Variables, Objects and Functions
The var keyword & variables
When coding we often create variables using the var keyword. A Variable means something we can create and change. Variables can be used to hold different kinds of information, numbers, words, true/false elements, and more complicated groups of elements called objects.
In our code we create several variables - game, playState, and player and gravity
To start using a variable we need to declare it using the var keyword. You can see that happens with player right at the start of the code. After that we can just use player to refer to the variable, we only use var when making it (declaring it).
You may ask why do we list some variables at the start of the code or relevant functions. There are a couple of reason for this. While we are starting it is good practice to do this. It can also make our code simple to read and understand.
About Objects
Code in Javascript is organised in containers called objects. Inside objects are smaller individual variables called properties and groups of code called functions.
We can see two main objects in the our code, a game object and a playState object.
In the second to last line we see that the playState object is added inside the game object.
Writing and using functions
We have already written some functions in code. For the playState object we have written and added three functions to it; preload, create and update. We create and use these functions to help us to organise our code as they run in a particular order. The Phaser framework calls and runs the code in these functions one after the other as the web page loads.
As well as creating our own functions, we will also meet other functions which area already written for us that we can use. These functions are also sometimes called methods. To make things simplier in this book we will try to use only the term function.
Phaser contains pre-written functions which are bits of code that do certain jobs for us. We can recognise them by the use of brackets () after the name of the function being called. For example. here look at the following code.
game.add.sprite(0, 0, "background");
Here we use a function of game called game.add.sprite() to create and add our new variable called player to the game object. Between the brackets we including three pieces of information called parameters.
The parameters passed to the function here are; the x co-ordinate 0, the y co-oridinate 0, and the name of the image to add 'background'. This particular function needs these bits of information to be able to do its job of adding the image passed to it at the right place in the game. We'll get used to passing parameters into functions as we go along. For now just try to be aware of these terms and try to understand how they are being used.