Video Making on Android
Sample intermediate video editor - Andromedia
AndroMedia is an Android video editing app that goes beyond clip trimming. It is one of the most feature-rich editing apps produced for Android. Andromedia enables you to edit together different video clips, and add still images, audio tracks, titles, video effects and transitions. You can then export clips in different qualities and file sizes, either directly online, or saved as an edited video file.
We already noted that smartphone and tablet video editing is not yet very advanced, nor very reliable. With Andromedia, we advise testing on your own device, to see what works for you and what does not. Do not expect this software to replace the use of a professional programme on a desktop computer. While it offers a lot for a “quick and dirty” edit, you may find it frustrating for multi-track audio and the editing of interviews. With in-device editing, the more complexity you as producer add, the less it is likely to work, so keep it as simple as possible. If you need to get your video out quickly, we recommend you follow the "no edit" ideas in the Templates for mobile video chapter.
The step-by-step guide here presents an “ideal” edit, using all of the functions that the app offers. Some of these functions may not work on your device.
THE TASK: For demonstration purposes, we will trim and cut together two video clips, add a title page with a photo background, and add a recorded voice-over and music track.
Download Andromedia from Google’s Play Store (it is free, but users complain of invasive ads. There is no pro version). Switch your device to airplane mode and close any applications which are running. You are strongly advised to edit with video you have recorded on the same device.
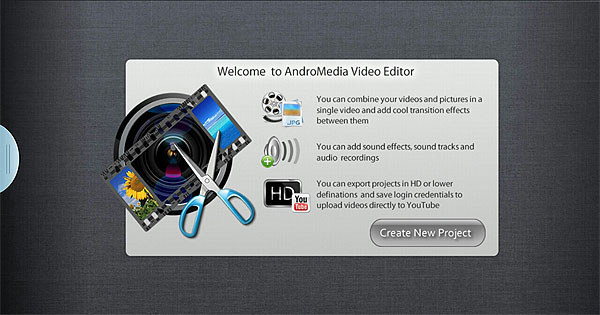
Open the app and Create New Project.

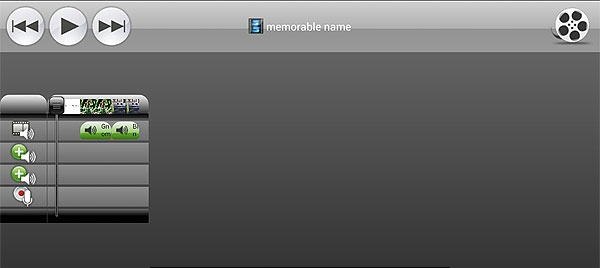
Give your project a memorable name.
Frame Size - make this the same as your original video clip.
Output format - mp4
Output quality - HIGH if HD, MEDIUM if SD
Frame rate - same as original video (eg probably 24 if UK device, 30 if US)
Default transition: NO TRANSITION
Click Ok.
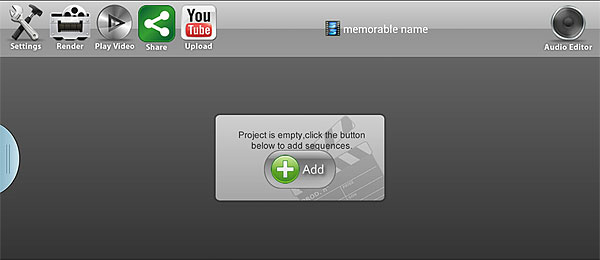
Click + Add.
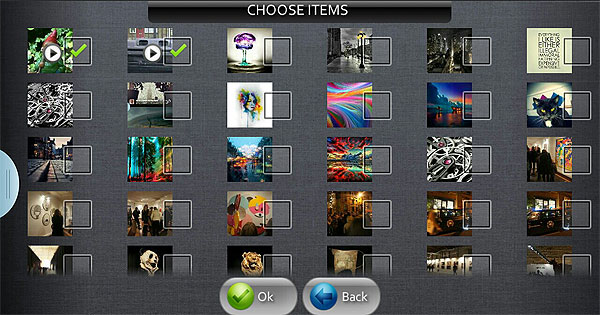
Select the videos and photos you want to edit.
Click Ok.
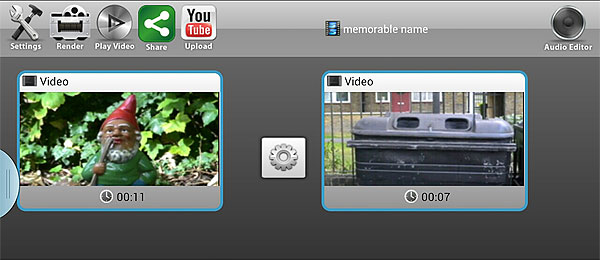
Order the clips in the timeline. Click the arrows left and right of each clip icon to move it up or down the timeline (= your edited programme).
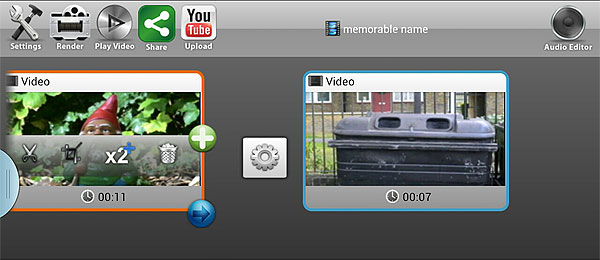
Edit the video clips. Click the scissors inside the clip on the timeline.
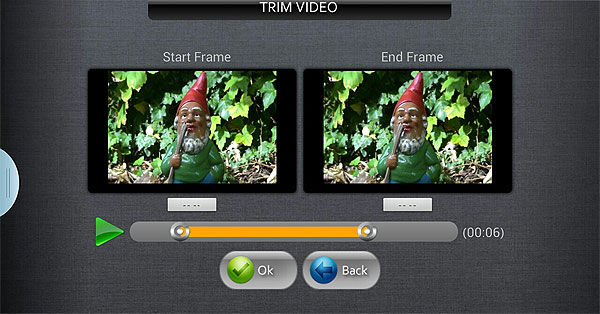
Adjust the Start and End frame with the slider. Press play to preview the clip. Adjust again until correct. Note that this function does not give the precise control that a desktop video editing software gives, making it very hard to edit interviews.
Make a title. The titling function on Android editing apps is very primitive, so it would be better to make an attractive title image on GIMP or Photoshop separately, and import that into the project. However, to add some journalism to a fast-turnaround news clip, the titling function on Andromedia can be useful.
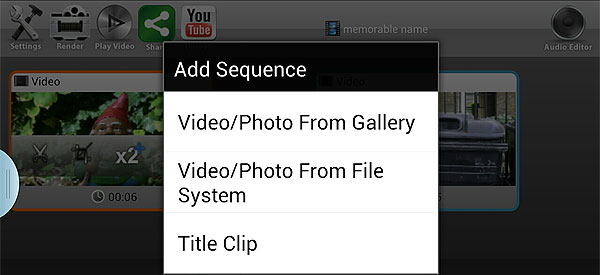
Click Add + at the side of the first video clip.
Click Title Clip.
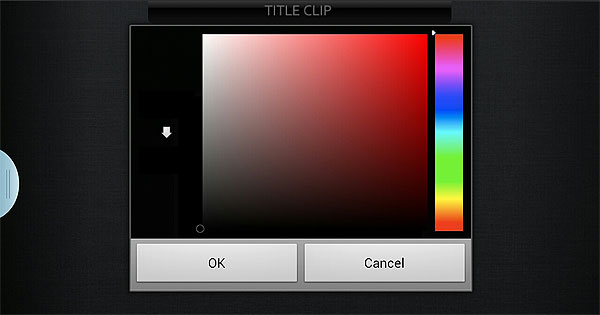
Click Menu. Click Change Background. You can select a photo or image to go behind the title, but make sure it is not so colourful that you will not be able to see the text. We will Select Color. Choose your background colour.
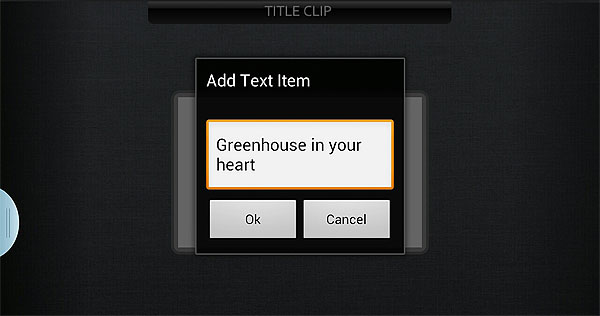
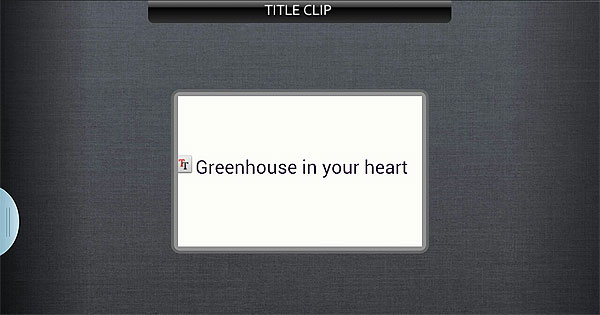
Click Menu. Add item. Click the title screen. Type title text. Click Ok.

Click the TT (Text) symbol. Click Edit style.
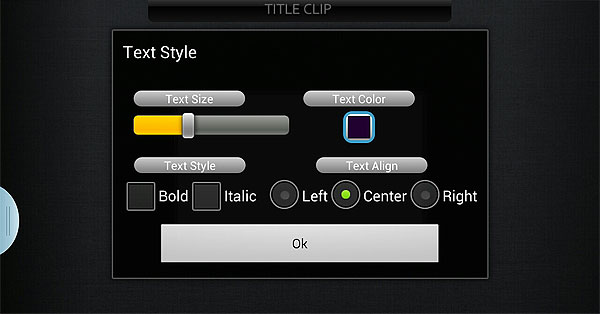
Change text size, colour, style and alignment. Ok. Drag the title itself (not the TT symbol) to move the title to the correct position. Click Menu. Save. The title is now in the timeline. Move it to the beginning of your edit.
Now animate the title. Click the Pan and Zoom icon on the title (the second from the left). Crop gives you the ability to manually change the size of position of the text in the same way as the edit title option. To animate the title text, click Ken Burns (Burns is an American documentary maker who uses a lot of pan and zoom across photos). We will animate the title zooming out from the centre of the frame. Start is already highlighted. Drag your text to the centre of the frame and squeeze resize it as small as possible. Click End. Squeeze resize so that the text is large. Click Play to preview the animation.
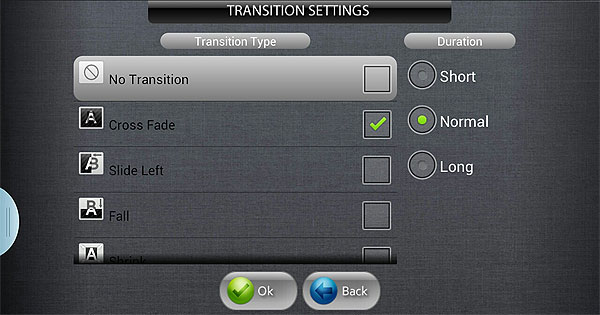
Make Video Transitions. Click the cogwheel between the title and the first video clip. Select Cross Fade and Duration Normal. Click Ok.
Add audio tracks. Click Audio Editor. Now you see a multi-track timeline, similar to what you get in desktop editing software. The top track is your edited video, and the bottom 4 tracks are audio. The first audio track is the sync sound with your video. The next 2 tracks can be edited to take any other audio source, eg a music or effects track.
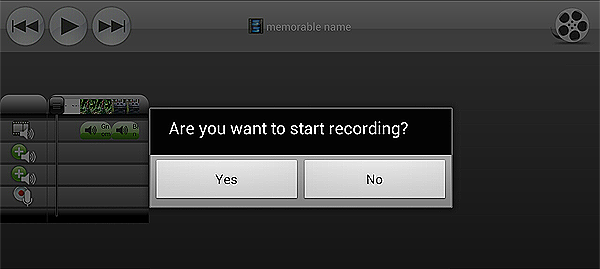
Add a voice-over / commentary.
The bottom track in the Audio Editor is a very user-friendly way of adding a live-recorded voice-over, such as happens in an edit in a newsroom. First of all, write down your voice-over and practise it. Find a quiet place to record. Move the timeline cursor to where you want your recording to begin. Click the microphone icon and speak with your mouth close to your phone or tablet. Click stop when you have finished. Play back to check. If necessary, click the track to delete and redo.
Add a music track. Place the timeline cursor where you want the music to begin. Click one of the green + icons beside audio tracks 2 and 3. Find your music file and click it. Notice that the track is in position on the timeline. Usefully, the music clip will automatically be edited to the length of your video. To edit further, click the track. Click Edit. Use the slider to edit the in and out points. You can also adjust the volume and fade in and out. Click the film reel to return to the project window.
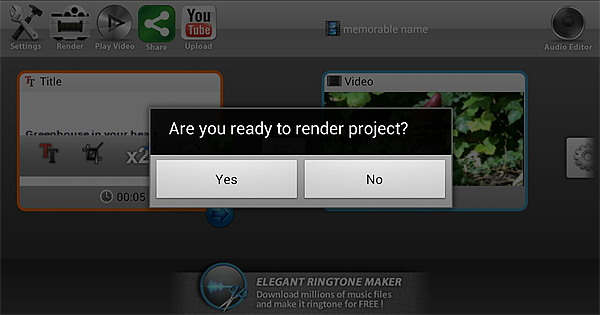
Render your video. Click Render. Click Yes.
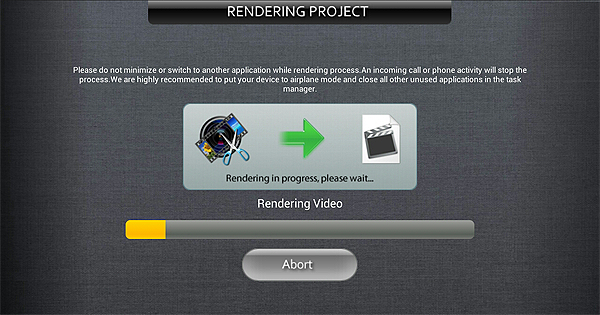
Wait. DO NOT minimise the app, or attempt to do anything else with your phone or tablet. When completed, play back to check. Export your video. Your video is by default saved to your SD card.
To upload to YouTube, make sure you have a reliable wifi connection. It is best not to use 3G. Click the YouTube icon, and fill out the form. Click Do not show push notification ads.
Finally, although Andromedia is closer than most to being a complete editing app for Android, it still falls short in some features, and in reliability across all devices. Remember to keep your shooting of video on mobile devices simple so as to communicate directly and speedily with your viewers.