
Posts are what you think of when you think of a blog; they’re dated, and appear in reverse chronological order, moving down your blog as you publish new ones. T
Ready to publish a post? Get started by clicking the “New Post” button — the pencil icon on the left side of the toolbar at the top of your screen:

Or click on My Sites, then on Add next to “Blog Posts.”

This will create a draft post on your blog and open up the post editor:

In the top field, insert a title. Go for clear and intriguing — if your title doesn’t make someone want to click, your post isn’t going to get read.
In the large area below the title, write your post. To add more interest, use the formatting buttons, which you may recognize from a word processor. Along with standard formatting options like bold, italics, and bullet points, there are two specific tools here that are helpful to know about: the link and quote tools:

Highlighting text in your post and clicking the link button will allow you to insert a URL to create a link, like this one. Highlighting text and clicking the quote button will create an indented blockquote, like this paragraph.
Now, let’s add a picture. There are two ways to do this: you can drag the image files from your desktop right into the post where they’ll be automatically uploaded and inserted, or you can use the tools within the editor.
To add an image from the editor, place your cursor in the text where you’d like to put the image, and click Add Media button:

Then, click Upload Media. The Media Manager will open and walk you through the process of choosing, uploading, and inserting the picture:

(By the way: as you do all this, we’ll be auto-saving your post every few seconds so that nothing gets lost.)
Once the file uploads, click Insert to put it into the post, or Edit to see the file’s details:
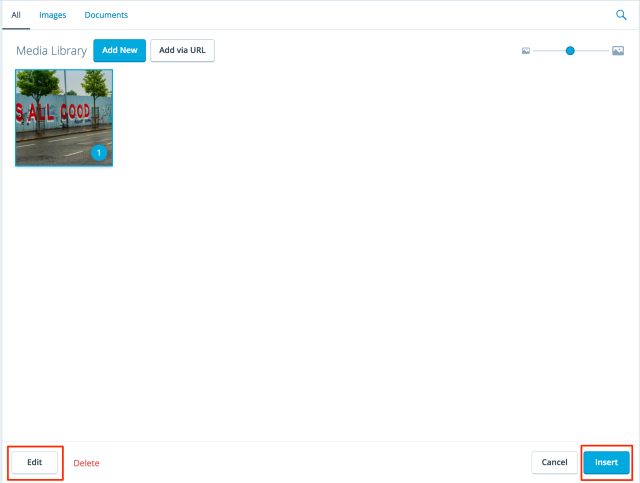
If you click Edit, you’ll be able to give the image a caption and a description, then click Insert to put the image into the post.
Once the image is in your post, you can choose its alignment and adjust its size. Click on the image to pull up these options:
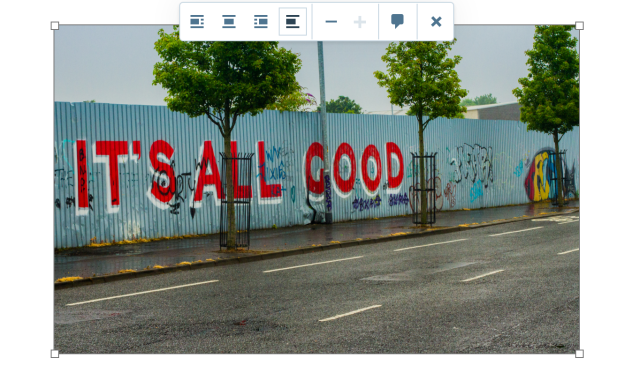
If you’d like to have your words wrap around the image, choose a rightor left alignment option. Use the plus and minus signs to increase or decrease the size of the image, and the thought bubble to edit your caption.
You can also adjust the size of your image right in the post by clicking and dragging one of the boxes at the image’s corners. To remove the image entirely, click the X.
Your post is almost ready! Before clicking Publish, give your new post a few tags and categories — you’ll see an area for that in the left-hand column:

I’ve given this photo of a mural the “Travel” tag, which will allow people browsing the “Travel” tag in the WordPress.com Reader to find my post, and the category “Photography” so people who visit my blog can find it among the other kinds of posts.
When you’re ready to flip the switch, click Publish at the top of the page:

You’ll see a small “saving” note over the publish button, followed by a notice that your post has been published and a link to the live post:
![]()
Congrats! You’re a published blogger.
If you notice a typo on your brand-new creation — doesn’t it seem like one always manages to sneak in? — you can always edit and update the post. Click on My Sites in the upper right corner, then on Blog Posts. This pulls up a list of all your posts, and you can click Edit to make changes:

If you’re looking for more guidance, or want to dig deeper into your publishing options…
- Make your blog private, or set personal posts to be password-protected to you can control who’s able to read them. Learn more about your privacy and visibility settings.
- Add images to make your posts and pages pop, even if you’re not a photographer. The web is full of free-to-use images.
- An “About” page is usually the most-visited page on a website — create an irresistible one. Our About Page 101 and About Page 201 guides will help.
- Category pages are a great way to organize the content on a blog and make it easy for readers to find what they’re looking for. Learn why we think they’re so nifty and how to set them up.
- Wondering what the “Featured Image” section in your post and page editor is for? Learn what featured images are and how to choose the perfect one.